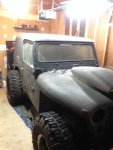
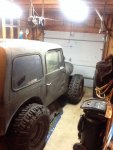
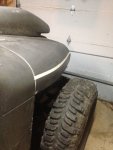
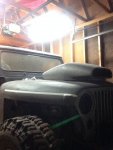
Build Thread 84 CJ7 coming full circle

Build Thread 84 CJ7 coming full circle
I'll post up a few more pictures later when I get a chance, but I just figured I'd fill in with an update...Didn't quite get finished, as I had a run-in with my cutoff wheel and my finger...whoops! :eek: So it'll be a minute before I can get back to work. At least until this thing closes up and I make sure it won't get infected. Got cut pretty bad.

Anyway, I'll post up what I've got as soon as I upload them later this week. Thanks for staying with me, y'all!
 
Ok, got a few more pics I can upload here. Still didn't quite finish this up, as I didn't get to play in the garage this weekend. It was just too cold for me…:eek: That, and my finger still isn't healed up. It's closed enough that I'm pretty sure I'm no longer at risk for infection, but it will still split open if I move my finger too much. Definitely should have gone to get it stitched closed, but I'm a stubborn a….mule. :D

Anyway, on to the good stuff. Well, good in my humble opinion, anyway. Where were we…

Started by knocking all the goodies off the end of the inner c's (both sides).
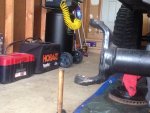
image_zps393801b1.jpg

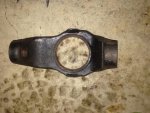
Then knocked the inner c off, after HOURS of grinding (again… Didn't we talk about this already, Pete? LOL… :rolleyes:)
image_zps51760bb6.jpg

image_zps6976b245.jpg

Already posted this pic, but this is where the schtuff got real. haha…There was no turning back here. Took about 6 thousand measurements, transferred them to the driver's side, then broke out my favorite sawzall. :cool:
image_zps131079a5.jpg

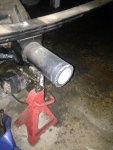
Having access to a machine shop has its perks. Made this sleeve to be a slight interference fit, so it took some oomph to get it into this tube. Then the cut-off long side was transplanted to the passenger side.
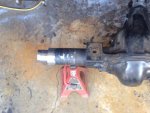
image_zpsaa817577.jpg

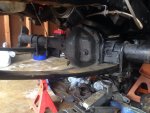
Once I had it knocked in place with a few gentle slams of my BFH, I leveled the axle by the old spring pad, then set my castor angle at the inner c. Once I was happy, I made a number of strong tacks to keep things from moving, then burned it in all the way around. For those that are skeerd, I beveled one side about 1/4" or so deep and took two passes all the way around the tube.
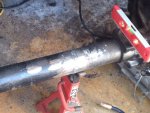
image_zps10172d62.jpg
I must also say, if anyone is afraid -- "have no fear, I'm an engineer!" If you have had the pleasure of working with any, you'll find as much humor in that statement as I do. (if there are any engineers out there reading, no matter the discipline, please do not be offended and write me your hate mail. I only intended that as a joke…) On the other hand, I'm also a certified welder. I'm not afraid at all that this could be a weak point. Only reason I'm bringing this up is I've already had some skepticism from a friend who I showed my hair-brained scheme.

Another…
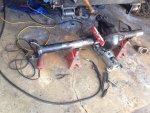
image_zps62cd9c0e.jpg

Weld ground flush in the middle of the tube, so you can't even tell anything had happened after it gets a new coat of black. Other inner c has been aligned and welded.
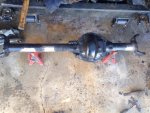
image_zps77b34fad.jpg

Sitting in there, to figure out what exactly to do for a spring perch.
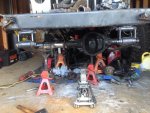
image_zps26ee8de8.jpg

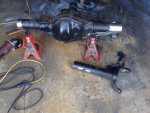
Once some measurements were taken, I pulled the axle again to cut some steel to make a spring perch. I had to lose most of the web from the differential to the diff tube. Not worried, as the spring perch, being fully boxed, adds the lost strength back in.
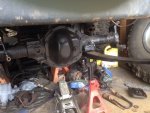
image_zpse1f53c83.jpg

And finally, this is the new short-side perch. Have no fear, the proper weld procedures were followed in the joining of these two dissimilar metals. I would not recommend this to anyone who even for a minute has a second guess or questions their own abilities. It really took some thought and some nugget-scratching to decide that this was the way I wanted to go. But all-in-all, I'm happy.
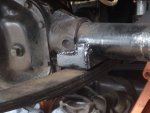
image_zps21a7966b.jpg

So that was where I decided to try to lessen my digits to 9…Hopefully next time I'm out in the garage, I will be able to reassemble the knuckles, and get on to lowering and slightly stretching the rear suspension. :D

Then we'll see what other hair-brained idears this here redneck can conjure up...
 
I had some time to go play in the garage on Saturday...we're getting somewhere! Any progress at this point feels great...baby steps...lol

I trimmed down the gussets on the front axle differential so I could get u-bolts to fit properly.
image_zpsd0jfzddc.jpg

I think I'm going to make different spring plates eventually, though. Ones that will act as a u-bolt skid. Down the road, though.

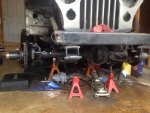
Another view of the axle bolted in and installed, rotors & hubs reinstalled. Don't mind the piles of junk under the jeep! :eek:

image_zpsvmooi86x.jpg

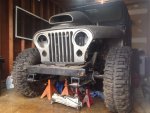
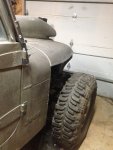
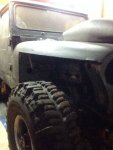
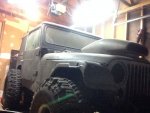
Put the tires back on, and off the jackstands...WOW, this thing just got low. :cool: At least it was what I was going for (I think, anyway...haha).

image_zps4leu97hh.jpg
image_zps445hnoc4.jpg
image_zpsc3e7vaie.jpg

Yep, now it nose-dives like you wouldn't believe...so I took the rear tires off and lowered the rear down onto jack stands to level it out.

So now my magic numbers are 19" to the frame sitting level. Front axle is now 61.5" wms-wms. Basically, it's stock height suspension, only on 38" Boggers. Don't have a ton of up-travel, but I was aiming for the suspension to be able to droop well. Obviously I'm going to have to do some..."creative massaging" we'll cal it...to the body to keep the tires from self-clearancing. I'll also need to figure out what to do for a rear axle, unless I just narrow mine. It's currently 64" wide.

Stay tuned, y'all...one of these years, I might have a working rig again. :chug:
 
Been a minute, once again...I guess I keep busy one way or another. Not a whole lot to add, just a couple small things.

Lowered and slightly stretched the rear suspension.

image_zpsuilnqh9h.jpg

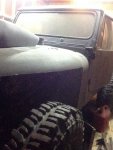
The tire has a slight interference issue with the body...Kind figured. :rolleyes: Marker line of what I think I'm going to cut out.

image_zpsidxpzqh4.jpg

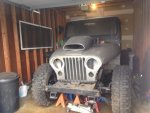
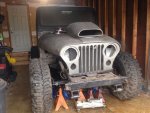
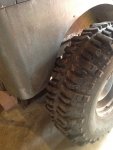
Ever wonder what 38" Boggers look like on stock(ish) height suspension? :laugh:

image_zpsjkrenoii.jpg

image_zpsixfwapnl.jpg

Yeah, that rear tire is just leaning against the body...doesn't quite stick out that far.

Next order of business...Narrowing the rear axle after I cut out the rear wheel wells, then figure out what I'm going to do with the front hood/fender situation. The other fiberglass fender idea I had got scrapped. The longer I looked at it, the less I really liked them...that, and now my front axle is narrower than it was when they were made, so they'll be a little too wide. Oh well, live and learn...right?
 
Oh, and I also failed to mention that along with lowering the suspension, I needed to raise my motor...was a little close for my comfort between the crank pulley and front axle tube. So I raised the engine about 1.5", as well as raised my transfer case up until it was all kinds of up close and personal with the floor. So I made a new transfer case mount with some DOM, 1/4" plate, and poly bushings. No pics for proof, though. Maybe next time. :eek:
 
Months later, minutes of progress. All I can tell myself at this point is that any progress at all is better than no progress. Still remaining motivated that one day I'll have this finished and driving again.

Since last time: the rear suspension was stretched a couple inches and we had tire interference with the body (y'all saw that already). I centered up the axle, had it setting on its weight on jack stands, set the pinion angle and welded in the rear spring perches.

The sawzall came out to make room for the tires. I cleaned up the cut (some...) and squirted a little primer on the edge so it doesn't rust. Bolted the tires back on.

image_zpsdcfva57d.jpg

image_zpsckk1ewqb.jpg

In other news, I rerouted the front brake lines back to their stock location. Rebuilt one front caliper. Couldn't do both, because one was seized up and wouldn't come apart, even with 125psi at the compressor. Oh, well... I'll have to go to the parts store and order another one. What happened to the day when 70s Chevy brake calipers were on the shelf??

I'll have to get some more 3/16 brake line for the rear... I kinked one re-bending it after I got done with the perches. :eek:

Number next on the list (after brakes):

Re-wire the whole shebang.
Fill unneeded holes in firewall.
Cut holes for tail lights.
Build new dash.
Build new seat mounts.
Hi-line hood and fenders.
Build new and/or modify existing fenders.
So something with that Gonzo hood.
Level the suspension (raise front 1").
Build exhaust.
Re-paint.
New windshield/wiper linkage.
Find a suitable fuel tank.
Build skid plate.
Lockers.

Just keeping a list here so I can stay on track... I keep finding myself getting distracted and trying to do too many things at once. One thing at a time...

Merry Christmas y'all! Oh, and when did we as society get so politically correct that we don't even know what politically correct is anymore? Everybody at work says 'happy holidays' because they're too afraid to mention the word Christmas for fear that somebody is going to get butt hurt and complain? Well guess what? Don't like it? Don't read it! Don't listen! All this 'safe spot' :dung: gets my blood to boiling...
Ok, I'll step off my soap box now. :rolleyes:
 
Well, got the calipers and new brake hoses installed. Finally have a complete braking system again! Woohoo! No pics, because brakes are boring. :rolleyes: Brakes are for quitters, right? I still need to fill with fluid and bleed them out, though. Also still need to finish installing the e-brake cables. Have the ones from the drums to the frame installed, just have to fish the new mid-cable through the frame and hook up to the pedal.

In other news... Looks like I'm about to do something kinda silly and a little permanent. :D Just my style, I suppose.

Warning! Those that are faint of heart, a little squeamish, or otherwise put off at the sight of cutting up a CJ, please looks away now!

image_zps7v7rjreq.jpg

image_zpsfpvpqmjb.jpg

image_zpsgkph8jiw.jpg

image_zpsm129twck.jpg

image_zpszrqmexcj.jpg

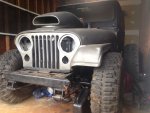
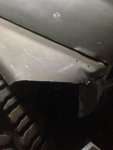
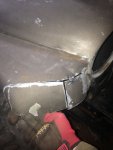
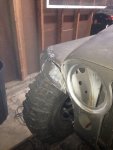
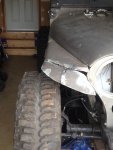
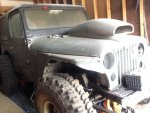
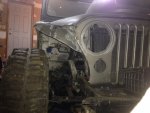
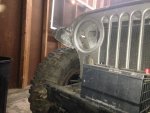
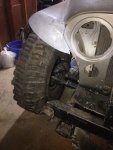
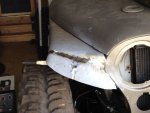
Started the hiline (highline, hi line, high line... Whatever we want to call it. I'm raising the dang fenders, mkay?) by marking out my height with a tape measure and marker... Made a complete line with masking tape, visual aid shown above. Once I got done with my second guessing, that this is kinda permanent, I broke out the sawzall for the first cut. The rough cut left about 1/4" to the tape line purposely to have room to clean up. Then I used the cutoff wheel to clean it up to the tape line. After that, I filed the edge smooth. I do plan on finishing the edge one way or another, one for the aesthetics... Two, for elimination of yet another spot that could require a tetanus shot (beyond just being within eyesight of my jeep :rolleyes:) But finally, to add some rigidity back into the edge of the hood. Good thing I had planned for that all along, huh?

Number next is to try and do something creative, yet unique for fenders. Not gonna do flat fenders... Also getting rid of the last idea I posted up on here for fenders. I suppose I'll report back when I have some results.
 
So I got to go play outside again today.

latest


Lol now that's out of the way...

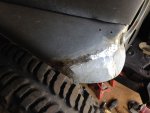
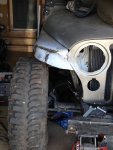
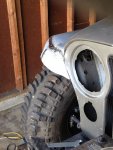
Figured I would start working on raising the fenders. Started with drilling out the spot welds and peeling out the inner fenders. Drilling spot welds is boring, so I didn't take any pictures... Shame on me. Maybe I'll add them tomorrow. Anyhoo, once I did that, I drilled new holes in the rear mounting flange to raise the fender. Drilling holes is boring... Boo, no pictures again... Wow, I suck at this.
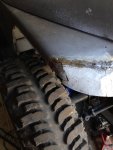
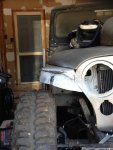
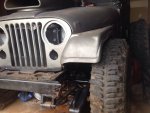
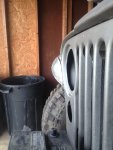
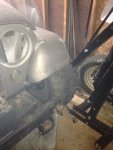
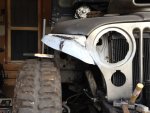
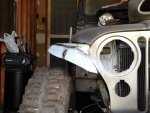
I loosely bolted the fender up, using the new holes so I could see exactly what wasn't going to fit and what exactly was going to hit. I ended up slitting the fender at the front down the mounting flange, forming that in around the grill, and closing the hood so things looked like they belong.

image_zpshfmnfvfa.jpg

Sorry, that ones kinda blurry.

image_zpssqjoyey5.jpg

Little more better. How much room did we gain?

image_zpsyfmlg2kq.jpg

image_zpsjh2zg5as.jpg

My Mickey Mouse calculator says I gained 3-3/8". I was aiming for 3-1/4" raise, so I'll take the extra 1/8" I suppose.

Now to do some massaging on the front of the fender to make this setup look like it belongs, as well as come up with something creative to cover them big tars, and maybe give a little more wiggle room.
 
Glad to see you back at it. The high line looks good. Gonna be tough to get those tires covered for our lovely Commonwealth. :rolleyes:
 
Thanks, Pete. It's good to spend some time in the garage again. Yeah, I figured it's gonna be tough to get past the refs, but I'm gonna give it the good ol' college try.

Started some sheet metal massaging today. Now, I'm going to lead off with a little disclaimer. I'm no artist (read: ahr-TEEST) when it comes to sheet metal work. :eek: so don't be cruel, mkay?

Here's what I was talking about with slitting the flange where the fender mounts to the grill. Notice that I already took another swipe at my fender with the sawzall before this picture. Also re-drilled holes and cinched it down snug.

image_zpsmakhuu5h.jpg

Next was eyeing up what I was imagining and making some marker lines to cut out. Also another angle of what's going on in here.

image_zpsvp5gif0w.jpg

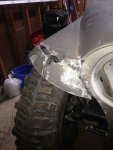
Just got real. This is where we clinch up the backside just a little... What's the worst that could happen? I trash my fender? Lol...:eek:
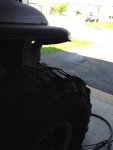
image_zpsvs4sosji.jpg

Oh, lawd, he done cut it off!
image_zpsdcmy7q5o.jpg

Little hammer and dolly action to change the shape a little. Note: I don't actually own a hammer and dolly set. I'm a little embarrassed at the moment to say what I actually use for a hammer and dolly. If anyone is really curious, just ask. I might confess.

image_zps6qqqociz.jpg

After I tacked that in place for mock-up, I decided I needed to hack more pieces off the front to change the shape a little more.

image_zpsg7pjzedz.jpg

image_zps0wqjoewi.jpg

Starting to see the shape I'm going for here.

image_zpstbpmv6kr.jpg

Little more tacking action, little nip/tuck going on, couple more relief cuts later, and...
image_zpsrai4qviw.jpg

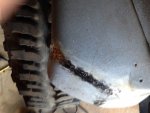
Few more tacks, grind down the welds... I still need to snip out a little filler piece and bang that corner into shape, but we're starting to get the idea here.

image_zpscpfnrl8t.jpg

image_zps35eqocqx.jpg

image_zps56bo5oyb.jpg

So y'all remember back in the day when I said something about going for the shape of a Willys-style fender? That's kinda what I'm shooting at here. Sort of.

Anyway, this guys next!

image_zps4uifsdlp.jpg

I've only got a couple more days next week before I start getting ridiculously busy again for the next few months... But here's hoping I can at least find an hour or two here and there to keep this progress going. Sure feels great to be working on something again.

Hope y'all like what's going on here. Can't stop now! We're all up in the middle of this mess now!
 
Note: I don't actually own a hammer and dolly set. I'm a little embarrassed at the moment to say what I actually use for a hammer and dolly. If anyone is really curious, just ask. I might confess.
Hitch receiver ball, and roofing hatchet? :D
Only half kidding about the receiver ball I've used one to shape metal in the past.

I was anticipating seeing the fender all welded up at the bottom of your post, so I look forward to seeing it.
 
Hitch receiver ball, and roofing hatchet? :D
Only half kidding about the receiver ball I've used one to shape metal in the past.

I was anticipating seeing the fender all welded up at the bottom of your post, so I look forward to seeing it.

Haha wow, you're good! Not far off, actually. The hitch receiver ball would really help a lot with some contours, though. I'm using a claw hammer and a 3 lb mini sledge... :eek: hey, it's getting the job done. Sorta. The 3 lb is serving as the dolly. I was also using the edge of the front bumper to shape the corners of the seams.

Yeah, I was considering not posting up until I was actually all welded up and somewhat metal finished, if not filled and primed. Sorry for the let-down there. As soon as I hit "submit reply" I had my second thoughts...oh well, live and learn, right?

Hopefully I'll have this all but about wrapped up early next week when Ive got a minute to play again.
 
Looks a little like you are going for the old Willys Wagon front fender look. I was thinkin' you were using a crusher ball, 1"x12" iron pipe and a length of hard wood like you find in a wire brush handle. A lot of really cool metal shaping can be done with a nice piece of hard wood. .... in the old days a piece of oak barrel worked too.

I really like what you are doing, especially the raised fender. I imagine you will be blending the bottom of the fencer into the body in a similar way to what you are doing now. Try not to rely on much filler in the front of the fender where you are working. There is a lot of vibration and flexing going on up there and filler might just pop right off. That wouldn't be good at all.
 
Hahaha nice one, Hedgehog! I've actually used wood several times doing sheet metal work. Works out very nicely.

Bingo! That's the look I'm going for. I could be mistaken, but I thought the Willys pickups had the same fenders. At any rate, that's what I'm aiming at. We'll see if I miss it by a mile, or at least have a few subtle hints in that general direction.

The bottom of the fender will be blended into the body. Good points on the vibration - mine seems to rattle much like a paint shaker sometimes... I guess they're all that way! I'm definitely going to try to get the metal as straight as possible to avoid using as much filler as possible.
 
That would be a mid 1950 and earlier Willys truck/wagon fender.
 
That would be a mid 1950 and earlier Willys truck/wagon fender.

That's the inspiration. I considered trying to copy that design directly, but then thought that it might look slightly out of place. I may still tweak the line on the bottom, but that won't be until I get the shape mostly down.

Went into the garage this morning to see if I could finish up the one side. I snipped out a filler piece, started tacking it into place. Then I ran out of wire... :mad: Not going to run down to the store and try to rush it now... I'll just have to wait until things calm down. So here's my almost finished fender. Still need to finish filling in the one spot I had, little more hammering to do, then I'll see if I like it. It's still progress, though, I suppose.

image_zpsixncriur.jpg

image_zps5pe0anyf.jpg

image_zpsu2efh90y.jpg

And decided to squirt a little primer on it so it doesn't rust between now and the next time I have time to work on it...

image_zpseor955gx.jpg

I guess I could have gotten started tearing apart the other fender, but in my feeble mind, it seems best to finish one the way I want it, then use it as a model for the next. Hopefully that's going to be a good plan, anyway.

Well, I suppose that's it for now. Hopefully it won't be eons until the next time I'm able to post up some progress.
 
Wow, that last picture shows a lot more drop toward the vehicle center than other angles show. Looks odd, but its a look that might grow on me/anybody.
 
I like the look Scoot! :chug:
 
Wow, that last picture shows a lot more drop toward the vehicle center than other angles show. Looks odd, but its a look that might grow on me/anybody.
There is something odd about that camera angle when I took the picture. I was being a wuss and left the garage door closed because it was 17 degrees and blowing wind with a ridiculous wind chill. Probably will be spring time before that primer dries... :rolleyes: but there is still some massaging to do on that fender, and I have one more trick up my sleeve after I make the other side match.

I like the look Scoot! :chug:

Thank you sir! I'm starting to dig it myself lol :chug:
 
Five more months, 10 more minutes worth of work. :rolleyes:

Got some time to go outside and play again. Last time, I ran out of welding wire and was forced to stop where I was. Well, I came armed with pounds of wire and a few ounces of motivation today.

Started with finishing up the little filler piece I started to tack into place (well, after sanding off the primer I put down):
image_zpsmhzjsego.jpg
image_zpszdzusbws.jpg

Next course of action was to smooth down the hump on the corner of the fender.

image_zpscwshvesm.jpg

See that little guy on the corner? Yeah, that one.

image_zpszn9msnrc.jpg

Little slice and massage...

image_zpsuysgodzc.jpg
image_zpsbx3hyvlg.jpg

Then trim off the overlapping sheet metal.

image_zpsdr1gckdn.jpg

Tack and sand... Taaaacckkkk and saaannnddd....
image_zps8pfx0pvo.jpg

There, that's more better!
image_zpsfvcindcz.jpg

image_zpsrgggrsfi.jpg

Forgot to take some pictures of a little filler piece that was needed on the side, but you can see the profile here when it was done.

image_zpsjztf37kz.jpg

And here's the (almost) complete re-done fender profile:

image_zpsucsw7kw6.jpg

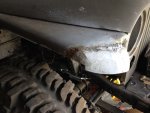
I say almost, because I didn't quite have time to address something that is kind of bothering me. If you look closely where the hood, fender, and grille meet together, there is a small gap. It's that little triangular-shaped hole there in the corner. Hopefully, I'll have time to do something with that tomorrow. I also re-shaped the profile of the front some. Doesn't quite dive down as much toward the center. May take a little more massaging, but I'm not done with it yet. Then hopefully I'll have some more time on my hands to make the other side match. That will likely prove to be even more of a pain in the rear than it sounds like right now! I suppose time will tell...
 

Jeep-CJ Donation Drive

Help support Jeep-CJ.com by making a donation.

Help support Jeep-CJ.com by making a donation.
Goal
$200.00
Earned
$10.00
This donation drive ends in
Back
Top Bottom