Build Thread 84 CJ7 coming full circle

Build Thread 84 CJ7 coming full circle
Looking good. You can really see the cab shaping up. You bring those sawzall skills over to my place one day. We'll put the boat sides on my Laredo and I'll send you home with a brand new gas tank. :D
 
Please post some more pictures of the hard top. Where did you cut and how are you piecing it back together. I have a CJ7 Hardtop, so I'm really interested in this part. Thanks, PB
 
Looking good. You can really see the cab shaping up. You bring those sawzall skills over to my place one day. We'll put the boat sides on my Laredo and I'll send you home with a brand new gas tank. :D

You, sir, just might have yourself a deal! :chug: I'd just need to pass that one by the boss (wife) to make sure it's all good. We usually reserve our weekends for us, but I think I could talk her into it. I work nights, she works days, so we don't get much time together during the week. But I'm inclined to say you're on! :D

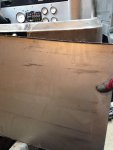
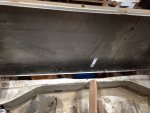
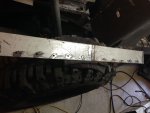
Got the back closed off today. I started with bending a flange at the bottom of my sheet metal panels. I caved and used some sheet metal from Lowes. I know, I know, it's WAAAAAAAAAY overpriced... But it was there, and I had gift cards that I haven't used, and I didn't need anything else at the moment. So it was kinda free...sort of.

Anyway, I don't have a sheet metal brake. But I do have some scrap angle iron and a couple clamps and a hammer.

image_zpslwrznbqq.jpg

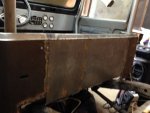
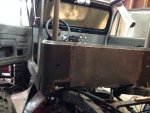
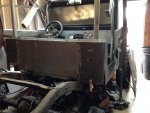
The sheet metal pieces were only 2 feet square, so I had to make a couple panels to fill the back. I eyeballed what looked good to fit in between the top bar and the bottom of the body (17"), so I used the remnant for one, then cut another. I followed suit with the flange at the bottom of each.

image_zpsxwcjascv.jpg

image_zps6c3hlsfj.jpg

image_zpsz6vetzsn.jpg

Next, I need to make a flange/filler panel to close this in, and tie in to the back wall of the cab to stiffen it up.

image_zpsviqru1y4.jpg

So anyway, we're getting there. Hopefully tomorrow I'll have that filler panel done. Working in closing the inside of the corners might be a bit cumbersome with my brand of tooling, but we'll see how it goes. I'll keep posting up progress as we make it.

Please post some more pictures of the hard top. Where did you cut and how are you piecing it back together. I have a CJ7 Hardtop, so I'm really interested in this part. Thanks, PB
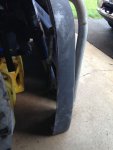
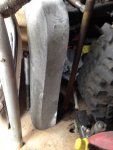
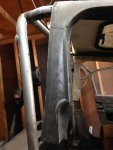
Hey PB, sorry about the crappy quality pics at the moment... But I'll make sure to get more details as I put it back together. I started with cutting right at the seam at the back end of the top, behind the side windows.

image_zpsm68so29f.jpg

image_zpsrntavqif.jpg

I have about 3-3/8" from the lower edge of the door jamb of the top here to the back edge where I cut.

image_zpspfbir8eu.jpg

This isn't how things sit, because I have the cage kind of jockeyed up out of position, and the top is hanging partially over the windshield. I'm probably going to fully remove the cage to finish the cab and fit the top. I may need to rework the cage to fit, anyway.

I cut the top before I cut the body, so I kind of took a huge risk there. I wanted to make sure all of the window was gone so I didn't have any filling to do there. Taking some rough measurements today, it looks like I cut roughly 34" out of the top, where as I cut 35.5" from the body. I intentionally cut the body a little shorter, 1) because where I cut the body looked best in my opinion, and 2) because I wanted extra material left on the top so I can properly shape it without having to fill back in. I want to make sure I get the back of the top vertical to match the cab. I know that the original angle of the back of the top will prove to create some difficulty when mating the two back together, but I do have some previous experience with fiberglass work. I'll make sure and post plenty of pics once I get started on it. Hopefully I'll be working on that in the next couple weeks or so.

Thanks for following along, y'all! :chug:
 
Last edited:
You guys sure know how to **** a feller of.... I go out in the garage, make lots of progress, marvel at my wonderful feats of creativity, then I rummage thru a post like this. I'm going back to Play-dough.

Seriously - this is why I love this forum...... The creativity level here is unsurpassed. There have been many days I've thought about sellin the whole pile, but after a few minutes on here (ok, hours, who am I kiddin?) my motivation level is back where it should be. This is the kind of thread that inspires the rest of us to do what we thought impossible. I would like to apologize for polluting your build thread, but I had to do it. Now, where's the tip of the hat emogi???

(Wonder what a crew cab CJ pickup would look like?????)


Sent from my iPhone using Tapatalk
 
Hey PB, sorry about the crappy quality pics at the moment... But I'll make sure to get more details as I put it back together. I started with cutting right at the seam at the back end of the top, behind the side windows.

This isn't how things sit, because I have the cage kind of jockeyed up out of position, and the top is hanging partially over the windshield. I'm probably going to fully remove the cage to finish the cab and fit the top. I may need to rework the cage to fit, anyway.

I cut the top before I cut the body, so I kind of took a huge risk there. I wanted to make sure all of the window was gone so I didn't have any filling to do there. Taking some rough measurements today, it looks like I cut roughly 34" out of the top, where as I cut 35.5" from the body. I intentionally cut the body a little shorter, 1) because where I cut the body looked best in my opinion, and 2) because I wanted extra material left on the top so I can properly shape it without having to fill back in. I want to make sure I get the back of the top vertical to match the cab. I know that the original angle of the back of the top will prove to create some difficulty when mating the two back together, but I do have some previous experience with fiberglass work. I'll make sure and post plenty of pics once I get started on it. Hopefully I'll be working on that in the next couple weeks or so.

Thanks for following along, y'all! :chug:

You're going about it different than I would, but your getting to the same place, and doing it fast. I thought about cutting my top and may do so after I see how you do it. My main concern was that angle at the back of the top. I'm also very interested in how you re-fiberglass it. I know very little about fiberglass. What will you do to make the joint between the back half of the top and the front half. It seems to me that just a few layers of fiberglass would not be strong enough. The back of you cab looks really good by the way. Keep going. I think I got my hands on an old 40's Chevy truck bed today. :popcorn::popcorn::popcorn:
 
You guys sure know how to **** a feller of.... I go out in the garage, make lots of progress, marvel at my wonderful feats of creativity, then I rummage thru a post like this. I'm going back to Play-dough.

Seriously - this is why I love this forum...... The creativity level here is unsurpassed. There have been many days I've thought about sellin the whole pile, but after a few minutes on here (ok, hours, who am I kiddin?) my motivation level is back where it should be. This is the kind of thread that inspires the rest of us to do what we thought impossible. I would like to apologize for polluting your build thread, but I had to do it. Now, where's the tip of the hat emogi???

(Wonder what a crew cab CJ pickup would look like?????)


Sent from my iPhone using Tapatalk
Thanks! I really appreciate the comments. Lol I know exactly how you feel. I was sitting back watching other people's progress on things, and decided it was my turn to turn a wrench, grab a saw, spark up the welder, or what have you.

Don't tempt me on the crew cab though! :cool: that definitely was a thought, but I'd have to buy another jeep body, and have much more space than I have right now. But I thought it best for me to try this project on for size and see how it finishes up, then maybe try my hand at something else down the road. You're giving me ideas though... That could be dangerous. :chug:

You're going about it different than I would, but your getting to the same place, and doing it fast. I thought about cutting my top and may do so after I see how you do it. My main concern was that angle at the back of the top. I'm also very interested in how you re-fiberglass it. I know very little about fiberglass. What will you do to make the joint between the back half of the top and the front half. It seems to me that just a few layers of fiberglass would not be strong enough. The back of you cab looks really good by the way. Keep going. I think I got my hands on an old 40's Chevy truck bed today. :popcorn::popcorn::popcorn:

If you look at how the hard tops were put together from the factory, you might not worry so much about it. They are actually molded in six or so separate panels that are assembled with adhesive. Using fiberglass cloth to tie them in after using a 3M fiberglass adhesive would work just fine in my opinion. I was thinking that I might use a few small sheet metal straps with framing screws on the inside, a little gorilla hair and fiberglass cloth tying the joint together inside and out. The framing screws and sheet metal straps would just stay in under the applied fiberglass, and you would probably hardly notice them there. I just think I'd put them on the inside in some inconspicuous places so there's not unsightly bumps on the outside.

But honestly, good surface prep is probably all you need to tie them back together with some fiberglass cloth and resin.

If you have gotten a deal on a truck bed, consider me jealous! I'm on the lookout, but I might try to build one.


No physical progress today... Just conspiring on my next move. I needed to step back and figure out how to keep from painting myself into a corner. Space is a premium in the garage, and I'm desperately trying not to take over the basement as well so I can keep the wife happy(ish).
I needed to figure out how I going to tie the floor in to the new back of the cab. I think I've got that figured out. Fabbing the corner filler panels might be a challenge, but I've got a hammer, a little patience and some tinacity. I'm hoping that between tomorrow and Friday, I'll have all the metal in the cab at least cut, formed, and in place. I'd really like to have it all welded in. We'll see what happens!
 
If you look at my new build thread (link below) you can see how Jeff finished his floor. He cut some sheet metal rolled the edge and welded it in. The picture is in the first post about half way down.

I never thought about the CJ7 Hard Top being put together from pieces. I think I might attempt the cut down of mine after I see you finish yours up. :rolleyes:

Thanks for leading the way on this type of project! :notworthy: We're all watching.
 
If I wasn't in need of a engine and going on vacation the end of the month this would be at my house:

TRUCK BED
 
And it has a wood floor! Imagine THAT nicely sanded, stained, and finished. Wooden shift knobs, dash knobs, and steering wheel to go with......


Sent from my iPad using Tapatalk
 
If I wasn't in need of a engine and going on vacation the end of the month this would be at my house:

TRUCK BED

Why is all the good stuff up north? :confused: Oh well, I'll have my truck bed tonight. :D
 
And it has a wood floor! Imagine THAT nicely sanded, stained, and finished. Wooden shift knobs, dash knobs, and steering wheel to go with......


Sent from my iPad using Tapatalk

And at $150. :drool: I'm so ashamed I'm this poor right now. This is about 15 minutes from my house. Since I can't grab it maybe Scooter can. :chug: I know I'm really rethinking the Aqualu box now.
 
Man! Talk about a find! It's almost not fair posting that up on here, but then again I greatly appreciate it! Great find, it is... I think I'm going to have to see if I can sweet talk the boss into letting me spend the money.


My only problem is trying to find a place to put it in the meantime, but for that price... I think I'll have to make room for it! :chug:

Didn't have time to make any progress again today, but I'm definitely spending some time in the garage tomorrow... More to follow!
 
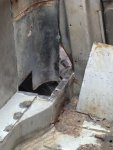
Got a little more progress done yesterday. The rust issue is really slowing me down because I want to get this right. I'm having to recreate a lot of little parts for the inside, and the structure of the floor. I had no idea it was in this kind of shape... But like i said before, I guess it's good I found it now rather than later

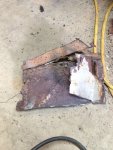
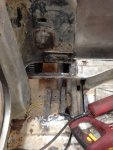
More rust cut out... Now that all the :dung: is out of the way, (besides that little spot by the b-pillar) I can see what we've got to work with.
image_zpscaemsnk9.jpg

There goes the neighborhood...

image_zps3r1c4b32.jpg

That was part of the rocker, as well as the bottom of the b-pillar. Now here's the gaping hole...
image_zpsgcdeccwy.jpg

Well, that was fun. Let's start putting this mess back together. The hole in the floor is nearly done.
image_zpsvzf1rynr.jpg

I say nearly, because as I was welding in the last piece of the floor pan, the auto dark on my weld hood was becoming not so auto... Well, that sucks. So I stopped working on the floor, began fabbihg some of the little pieces to finish the floor to rocker structure, and one filler piece for the corner on the inside.

image_zpsi7ykm9zx.jpg

I'll make a flange for this filler piece so it's a bit stronger around the corner. PB, what was in your thread was exactly what I had in mind to fill the gap between the floor and the back wall of the cab. That, and clean the years worth of filth off of the inside of the corner before I do some kind of lining on the inside of the cab... Well, after I finish everything else.

So I won't be working on it for the rest of the holiday weekend... But I'll pick up a little more progress on Tuesday. We're getting there, slowly but surely. More to follow!
 

Lol thanks for taking interest in this. I really do appreciate it. Sometimes I wonder if anyone is out there... :chug:

Yesterday, I didn't get a ton of progress done, but I did get all the filler pieces made to close in the gap between the floor and the back wall of the cab. I'm hoping that tomorrow I can get a TON of welding done to close in that gap. I'll get to finishing all the rust issues soon enough. I keep digging up more of them... I'll find a tiny bubble in the paint and start picking at it until I make a pinhole in the sheet metal. I should probably stop, but on the other hand -- if I don't fix them now, I'll only have a bigger problem later, I suppose.

Today, the only thing I had time for was to go buy a piece of tube from a local shop so I can start working on stretching the frame. I've settled in on doing an 18" stretch. I'll measure out what size bed I'll need to put on it after that. First, I was thinking 14"... Then started eyeing it up, thought that wouldn't be enough. So then I was thinking 22-24". That seemed a bit far, maybe. So I'm settled in at 18", so I bought 3 feet of 2x4 rectangle tubing.

Stay tuned! Let's hope that I do in fact get a bunch of welding done in the morning. :D
 
Lol thanks for taking interest in this. I really do appreciate it. Sometimes I wonder if anyone is out there... :chug:


Yup - We're here... While your project doesn't really apply to mine, I for one find use threads like yours as a learning tool for similar tasks, not to mention keeping me motivated in mine! Sometimes it does appear I'm talking to myself, but if you watch the view log, we're out here :chug: :chug:

I wussed out on my frame repair - I just swapped in a good one. Of course, the fact I found a solid donor frame for 60 bucks did help sway my wussyness...... LOL


Sent from my iPad using Tapatalk
Thanks. Lol I think that price would have me thinking twice about doing the repair myself, too!

Don't worry, we're watching. :D


image_zpsorzuopwg.jpg

:laugh: y'all are the greatest! :chug:
 
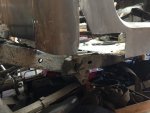
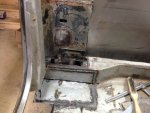
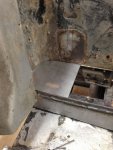
Nearly finished tying the floor in to the back wall of the cab. Only almost, because I ran out of welding wire again... :rolleyes: I know, I know, almost only counts in horseshoes and hand grenades. :cool: I do have another spool of wire, I just didn't have time to swap it out, prep the last filler panel, and make it permanent. On with the proof!

My filler panels are actually "repurposed" from my rear inner fender wells. These were the top edges cut from both, welded together, then a bunch of holes drilled in it for spot welds.

image_zpsujx5wxox.jpg

image_zps0lw7zao0.jpg

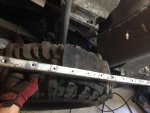
Making it part of the Jeep again. With a little cussing, grunting, and shuffling around, I got the under side welded too.

image_zpsqv4cp3ef.jpg

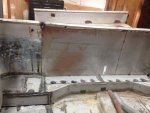
The corner is permanent, too. I had to make this one from two pieces, just because I didn't want to waste any remnants of the sheet metal pieces I bought from Lowes. I know, I'm cheap. :eek:

image_zpsjho7of7l.jpg

Next time, I'll make this one permanent, too. Oh yeah, there's that same little rust problem over there, too... Just not quite as bad.

image_zps2ab99avd.jpg

As soon as I get the big stuff knocked out here, I'm on the fence whether I'm going to finish the body or go ahead and get the frame work out of the way. Then the top... Then the hood... And exhaust. Oh yeah, and a truck bed. Baby steps, right?
 

Jeep-CJ Donation Drive

Help support Jeep-CJ.com by making a donation.

Help support Jeep-CJ.com by making a donation.
Goal
$200.00
Earned
$10.00
This donation drive ends in
Back
Top Bottom