Build Thread 1986 CJ-7 Renegade : Memories

Build Thread 1986 CJ-7 Renegade : Memories
Here are some YouTube links to good videos on brake drum work. It is not specific to Jeep CJ's but some good info, hints, tips, and tricks I thought were good for any drum brake work. Lots of repetition on info but each video I thought had it's own merits. I like ChrisFix videos very much.

https://www.youtube.com/watch?v=Q5j3sKgNoEs

https://www.youtube.com/watch?v=zJ_UXP6GWkw

https://www.youtube.com/watch?v=3FYRwfKNHxw

https://www.youtube.com/watch?v=70cB-plCF-g

https://www.youtube.com/watch?v=JePOTERmApw
 
Also replaced the wheel cylinders. Might as well when you got it all apart anyway but the only bad thing is you have to bleed your brakes after. If your wheel cylinders still look good and not leaking then you might not want to do it. You can rebuild them but a new set is about the same cost so.......

Squirt some penetrating oil on nuts and bolts before you start. I like Kroil a lot! Expensive but that stuff works. Don't need much either.

Use flare wrenches on brake lines. Damage the line, nut, etc. with a regular wrench and you're gonna wish you had bought a set.

Don't tighten up stuff too much on brake lines either. You don't need to bear down on these kinds of things for them to seat properly. Too much and you will crack the line, damage threads, etc.

Use never-seez when re-installing nuts/bolts. Much easier if and when you have to take them off later. You don't need much.

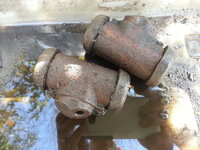
Old wheel cylinders:
xdbWGbK.jpg
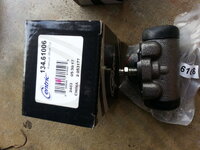
New wheel cylinders:
mTqaxw3.jpg
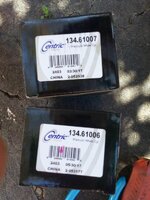
Box with numbers. They are different. One for left and one for right.
V2Fb8V4.jpg
 
Love me some Kroil... been using it for years.

I've got a set of shoes, cylinders and springs from Napa ready to go...

Good tips, thanks!
 
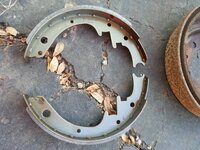
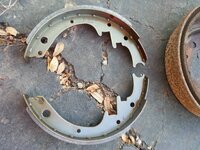
New shoes.

If you have original drums use only ORGANIC material shoes. Something I read about the old type drums get worn out much faster or will warp because of the greater heat when using newer composite/ceramic shoe materials. Course if you get new drums that might not matter.

IMPORTANT NOTE! For each drum set, one shoe will have more material then the other. Put one on top the other and you will see. In the pic below see how the lower shoe has slightly less material?

The one with MORE material goes on the rear side. The one with LESS obviously goes on the forward side.

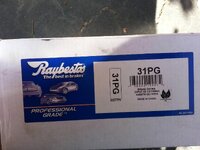
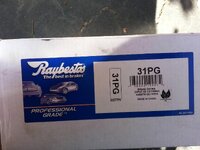
New shoe box
ksTPUah.jpg
New shoes.
gzXvo94.jpg
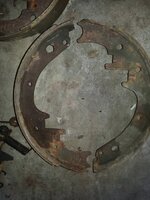
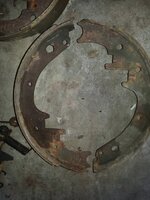
Old shoes
FtQVr58.jpg
 
New shoes.

If you have original drums use only ORGANIC material shoes. Something I read about the old type drums get worn out much faster or will warp because of the greater heat when using newer composite/ceramic shoe materials. Course if you get new drums that might not matter.

IMPORTANT NOTE! For each drum set, one shoe will have more material then the other. Put one on top the other and you will see. In the pic below see how the lower shoe has slightly less material?

The one with MORE material goes on the rear side. The one with LESS obviously goes on the forward side.

New shoe box
ksTPUah.jpg
New shoes.
gzXvo94.jpg
Old shoes
FtQVr58.jpg
NAPA USE TO GIVE LIFE TIME warranty on their drums and rotors, 27 years ago I got mine and kept the receipt, went back a couple of years ago and they honored it, but told me 1 year now. :(. Guess they never figured I would keep the receipt or my jeep that long. 25-26 years I guess was pretty good. I doubt their new ones will last that long.
 
More needed parts: So cheap I don't think it would make sense to not buy new ones. However you can buy each part individually that you need to replace if you want to save a little bit of money.

I did not have a drum brake tool set. I used old fashioned needle nose pliers to install/remove springs. Next time I do it I will get a drum brake tool set just to make it easier.

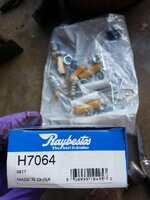
Drum brake hardware kit. Contains the springs and other parts common to both wheels.
I4k4UHk.jpg

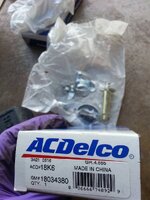
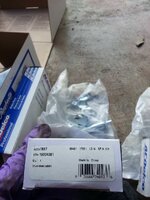
Parking Brake Adjuster Sets. Contains the brake adjuster parts. Need one for right side and one for left side. If you mix up the bags the different right/left parts have a R or L on them.

ovLON7s.jpg
4hcVX4g.jpg
 
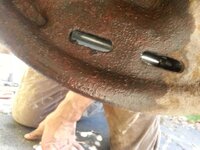
See these holes on the back of your brake assembly? They are access points to manually manipulate the brake adjuster with the tires still on. If you look closely you can see the teeth on the wheel through the hole on the right side of the pic. See manual on how to do this. The rubber plugs in the kits fit into these so dirt/junk doesn't enter your brake system through these holes. Mine were missing and the brakes had a ton of dirt in them. Don't forget to install them.

pwEXSle.jpg
 
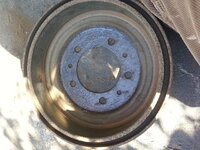
I put some never-seez on the inside of the drum. Just a very light light thin coat. Keep it from rusting to the hub and make it easier to come off. Also put a light coat of never-seez on the pressure points (not shown). Let's the brake shoes slide better in and out.

yzQeZJM.jpg
 
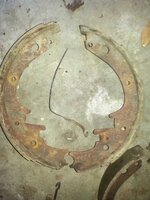
On one drum the adjusting cable was broke. This meant the shoe would not self adjust as it wore down after it broke and eventually you would only have full braking power on the other drum and not on both. The shoes on this drum were noticeably thicker than the other one. One of the reasons why I think you should replace everything. The old cables may look good but you can't tell that in fact that they might break at any time. The kits are not expensive and it's not like you change brakes like you change oil.

9pCdL6Z.jpg

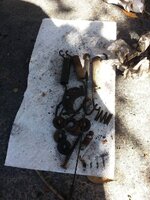
Look at these parts I took off. Don't put this junk back on.

BF70aLm.jpg
 
Last edited:
Any feedback on start-up improvement with the check valve in place? I've got mine on the bench ready to go.

No issues with performance that I can tell that some people were concerned about. Possible start-up improvement but that could be my imagination! LOL. Might help if it sits for extended periods. Week or longer? /shrug
 
Thanks for your brake job write-up. I'm planning on doing my first drum brake job this year and can use all the help I can get.

Take LOTS of before pics and only do ONE side at a time. That's the most important thing! It's not that hard. Make sure you check out those videos I posted. Those helped a lot. Watch them before you start. Good luck!
 
No issues with performance that I can tell that some people were concerned about. Possible start-up improvement but that could be my imagination! LOL. Might help if it sits for extended periods. Week or longer? /shrug

Thanks...

Here is some imagination:
When we first got the Jeep back together, the timing was set only well enough to get it down the road. Also couldn't find the OEM fuel filter so a cheap plastic filter was installed with only one in and one out port. The fuel tank vent line was connected to the charcoal canister. It ran rough, but the engine kiss started every time.

Took it in and got it timed and the Weber carb adjusted, brought it home and installed a new gas cap and the proper OEM, 3 port fuel filter. Now it runs great but starts hard, especially the longer it sits.

So what changed to make it hard to start?

I keep thinking that fuel is leaving the carb. when it sits. Could it be that, and this is the imagination part, by introducing the vent to the fuel line, that the vacuum is released which allows the fuel to drain out of the carb (much like taking your finger off the end of a straw filled with water)? If this is true, there could be a a few solutions:

1. the check valve.
2. capping off the vent port of the fuel filter and running the fuel tank vent line back to the charcoal canister.
3. Does the Weber (few miles on it since it was rebuilt in 2010) vary from the Carter in a way that is causing the problem.

I'm going to cap off the fuel filter vent port just to see what happens before installing the check valve.
 
Last edited:
Thanks...

Here is some imagination:
When we first got the Jeep back together, the timing was set only well enough to get it down the road. Also couldn't find the OEM fuel filter so a cheap plastic filter was installed with only one in and one out port. The fuel tank vent line was connected to the charcoal canister. It ran rough, but the engine kiss started every time.

Took it in and got it timed and the Weber carb adjusted, brought it home and installed a new gas cap and the proper OEM, 3 port fuel filter. Now it runs great but starts hard, especially the longer it sits.

So what changed to make it hard to start?

I keep thinking that fuel is leaving the carb. when it sits. Could it be that, and this is the imagination part, by introducing the vent to the fuel line, that the vacuum is released which allows the fuel to drain out of the carb (much like taking your finger off the end of a straw filled with water)? If this is true, there could be a a few solutions:

1. the check valve.
2. capping off the vent port of the fuel filter and running the fuel tank vent line back to the charcoal canister.
3. Does the Weber (few miles on it since it was rebuilt in 2010) vary from the Carter in a way that is causing the problem.

I'm going to cap off the fuel filter vent port just to see what happens before installing the check valve.

Did you put the return to the fuel tank of the 3 port fuel filter at the 12 o'clock position? If not, that could be causing your issue.

When I bought my Jeep it had one of those cheap 2 port fuel filters. I installed a new proper 3 port fuel filter and hooked it back up to the fuel tank return and it ran better. Something about the fuel pump over pressuring the fuel to the carb and causing issues if you don't have that return to the fuel tank from the fuel filter.

Could it be your battery? Starter? Bad grounds? Coil? Post your issue on the other sections and you will have more and much more knowledgeable people trying to help you than me! LOL
 
Thanks...


Now it runs great but starts hard, especially the longer it sits.

So what changed to make it hard to start?


When the jeep is hard to start, how long has it sat up ? I've got a Webber also. Anything over 2 weeks and it does get hard to start. I keep a little ether or also small jar with fuel and pour a small shot down in the carb and it fires right up.
 
Grounds!

Oh boy are they important! Without your Jeep being properly grounded, things don't work or work as well. Lights, starter, alternator, gauges, etc. all won't work unless they are grounded. AND they don't work as well unless they have a GOOD ground.

I came across some forum posts saying that Jeeps were not really grounded properly and that upgrades could be made to make everything work better (like the Team Rush upgrades). As I kept reading about these grounding issues, the more I was convinced I had to do something about it. After all even though everything worked, I was still going to keep this vehicle forever. As such I mean to make sure everything stays working for the long haul.

So today I started on improving grounds along with replacing/upgrading some other electrical cable since I was at it.

The following are some links for good grounding/electrical info that I read before I started. Some of it will be duplicate info. Some things I did a little bit different as you will soon see.

http://www.jeepforum.com/forum/f8/been-reading-good-book-jeephammer-833631/#post7724128
https://www.jeep-cj.com/forums/f7/basic-electrical-wiring-101-a-23836/
Vehicle Grounding - JEEPTALK.net
JeepHammer - Grounding Diagrams - JeepForum.com
Battery cables and grounds - JeepForum.com
Making Battery/Starter Cables Correctly... - JeepForum.com
BASIC WIRING 101, Getting You Started! - JeepForum.com
https://www.jeep-cj.com/forums/f7/grounding-electrics-clarification-20117/
improving your electrical grounds - Off-Road Forums & Discussion Groups
https://www.youtube.com/watch?v=byZOL3XgKgA
 
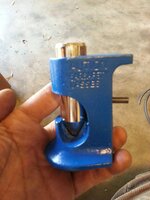
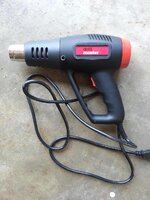
Few tools for making wire that I thought I should mention:

Hammer Crimper tool. Worked good too. Just make sure everything is good to go and positioned right before you give a good couple wacks on it with a hammer/maul. Saw some videos that showed it was almost as good as a expensive crimper.

9nkO4W9.jpg

Heat gun for shrink tubing that I got cheap from Harbor Freight. This worked good too.

NsLOXbk.jpg
 
Well all my stuff is working! Why should I run new wire you ask?

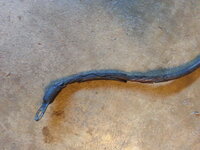
Look at this I found! It was my positive (+) cable from the starter solenoid to the starter. The jacket has disintegrated off of it over time. Wire exposed. Dirt and oil causing bad connection. Not to mention huge electrical and/or fire hazard! Didn't really notice it until I started looking at what I had before I started the replace/upgrade.

Lrp6Wk7.jpg

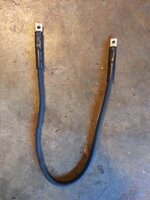
New one I made. What a difference! And it's #2 gauge vs the old #4 gauge wire.

lNcl2DG.jpg
 

Jeep-CJ Donation Drive

Help support Jeep-CJ.com by making a donation.

Help support Jeep-CJ.com by making a donation.
Goal
$200.00
Earned
$10.00
This donation drive ends in
Back
Top Bottom
AdBlock Detected

I get it, I'm a Jeep owner and ad-block detectors kinda stink but ads are needed on this site. This is a CJ site, all the ads are set for autos (some times others get through.) I cannot make them just for Jeeps but I try.

Please allow ads as they help keep this site running by offsetting the costs of software and server fees.
Clicking on No Thanks will temporarily disable this message.
I've Disabled AdBlock    No Thanks