Build Thread 1979 CJ7 Rapid restore - 1 Year build from tired and rusty to all go and some show..

Build Thread 1979 CJ7 Rapid restore - 1 Year build from tired and rusty to all go and some show..

DconZ

Jeeper
Posts
142
Thanks
61
Location
Southern Alberta - Canada
Vehicle(s)
1979 CJ7
I bought this 1979 CJ7 last year around this time. It kind of ran and kind of drove, not very well and the old factory 304 was very tired. It came with an orignal Hardtop, the old style hard doors, original softtop w/soft doors and all mounting hardware. The fenders were shot, holes in the floorboards, body mounts rotted, fuel tank leaking and of course the rockers were swiss cheese. Seats were out of some sort of pontiac sedan, dash and guages all intact and seemed to work initially. The previous owner was good enough to install a T-18 4 speed w/granny low at some point which was a bonus! As for the frame... the previous owners had applied so much undercoating over the years that it is pristine front to back, it is going to be a big job removing it all but I am not complaining. I chose this chasis as it seemed like it had not seen excessive abuse over the years and time iteself was its only enemy.


Here she is fresh off the trailer when I bought it home. And yes that winch works perfectly!

Before.jpgBefore7.jpg

Fast forward 1 year....
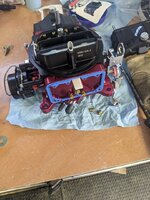


PXL_20230408_212315374.jpg
PXL_20230407_020250426.jpg
 
First thing first, ditch the 304, strip the exterior/interior, drop the fuel tank and start to tackle the rusted tub. While that was underway I sent the T-18 to a shop in Calgary for a complete rebuild ($2K cad) along with the Dana200 for a inspection and re-seal. One thing I did not check was the speedo gear. while its easy to get at in the rig, its just easier when its sitting on the shop floor. As I sandblasted and wire wheeled my way through the rust I contemplated the engine. I wanted to stick with AMC of course as I was investing in the T-18 so I bought a used 360 from a guy in Winnipeg who "assured" me it was a runner .. more to come on that.

PXL_20220703_203354983.jpg


PXL_20220703_203431124.jpg


PXL_20220806_181111650.jpg

PXL_20220807_184024351.jpg

Time to revive some welding skills! Ok more accurately time to learn how to MIG Weld. I grew up on a Scrap yard and learned to stick weld with the old ARC and the 7012/7013 rods I would get from my father when I as around 7-8 years old, while great for repairing the thick crusher and backhoe parts, not so good on the sheet metal! I burned a few good holes before going out and picking up the Lincon 180 MIG setup.

PXL_20220819_005232951.jpg
PXL_20220827_173951692.jpg
 
Some new patches in place! I repaired the tub good enough to buy me some time to source a new one and also to recover from the expense of the motor and underhood costs.. The rust will return on this one eventually and the only way to really get it all is to remove it completely, blast and cut it out then dip it. You need to look at what your time is worth and what the extent of repairing is vs just buying a replacement, can you afford a purchase or the time or are you going for an all orignal restoration. For me a new tub is what I have decided so the repairs I did are structurally sound but will only last a few years before the rust comes back I suspect.

PXL_20220823_031012888.jpg

Went with the Crown 15G plastic tank, new straps and sending unit. In hindsight I should have gone with the larger 21Gallon based on my motor choice :) more on that later.... There is room and I am considering making and secondary fuel cell as a reserve...


PXL_20220820_002102303.jpg

With all the holes patched and the rust wire wheeled and ground out a healthy coat of rock guard


PXL_20220827_220546533.jpg


PXL_20220827_230129347.jpg

The interior took me a couple months of elapsed time working evenings and weekends as much as I could. be sure to have a good variety of wire wheels, a couple spare batteries for your drill and grinder!. Seat choice was up next as well as wheels and tires as the body started to come together!
 
Time to really make my fingers really sore... windshield and door seal replacements! I have never tore down one of these doors before and well frankly when I used to work on this stuff back in the 80s and 90s before the tinernet I likely would not have been able to do this without a service manual or having a firend show me but here we are in the modern world and I found a couple great youtube videos on these old guys with a complete walk through. I ordered a complete CJ7 seal kit from JustJeeps.com. Its a crown kit and contained every seal except the small vent windows pretty much. I would suggest if you are doing seals to look for the whole kit. Its cheaper and frankly was easier than trying to find all of them separately The first one that arrived was for a jeep just not a CJ and it had some bizzare seals I did not recongize! They quickly replaced the order and never asked for the old kit back which was cool considering there were a couple seals that do fit the CJ so a bit of a payback for the delay in sending a replacement. The complete kit was about $450cad, well worth it in my opinion, came with every window seal, dorr seals are for old school doors, dont think they will fit the YJ ones, vent window is different.

The windshield that came with it was in perfect condition however I needed to get the rust out of the frame so had to pop the window out , deal with the rust and re-seal it after some more wire wheelin' and paint. The old door seals were also crumbling apart and needed replacing.

The doors took me 4-5 hours each from strip/paint then reassemble. You will need a second set of hands for the windsield install plus some soapy water and a piece of rope. You just need a helper to apply pressure while you pull the rope and seat the windshield into the seal. Its not that hard although I will say when removing the windshield where you want to keep it in tact, cut the seal and replace it. Its cheaper than busting the glass. It can be done its just a lot harder.

If you go with cutting the seal to remove, do it from the front side, you want it to come out forward, seems less awkward than handling it inside where the steering wheel is in the way, also easier to cut from the outside as there are no obstructions. You likely still need a second set of hands ( or a suction cup tool) to push the windhield out from inside the vehicle while you work it out of what remains of the seal, a somewhat firm plastic putty knife or similar plastic object.. do not use a screw driver or metal object on the corners of the glass trying to pry it out.. it will break..

PXL_20220821_1728575522.jpg

Doors.. this is one of the parts of this project that had me sweating and swearing the most up to this point. The window tear down for the most part was easy after watching a walk through on you tube. The hard part is the vent windows... They have been there for 40+ years and are TIGHT.. tight coming out and tighter going back in is what it felt like.. Use lots of soap and lots of patience, having more hands on this one doesnt help.. :( at least it didnt for me

PXL_20220905_041341949.jpg
PXL_20220908_000808599.jpg
PXL_20220908_000755271.jpg

PXL_20220908_025248706.jpg

Crown fender flare kit arrived while the doors were getting finished. Perfect fit and a cheap replacement - $150cad came w/mounting hardware.. if you find these without new hardware, find new hardware.. some of what you take off can be re-used but a bunch of mine were trash once I removed them..

PXL_20220910_220230033.jpg
 
Wheels and tires were up next.. building a functional bush rig so more rubber/less wheel and good bead holding ability. Selection at the time here in Canada (still is) Limited. I did find good old Super Swamper classic TSL's in 15" x 12.5.. 15"x8' polished procomp wheels, with a -12 offset. Finished up the new rocker panels at teh same time, I bent them around and they stick in 2" under with a nice round edge to avoid the leg slice when you slip against the side of when crawling underneath, nothing like getting a nice sheet metal cut to the skull.. they really show up when you are bald :) I tried to consider little things along the way that would help avoid pain the future!

Forgot to add, this setup rubs on the front springs at full right and left sweep.. need to push them out a little more so I am on hte lookout for a bit more -offset.. I think my only other option around here is -24 which may be a bit too much and not a fan of spacers... perhaps just one of the 1/4 or 1/2 plate style, coul;d be enough to just clear the spring, I will need to re-check how huch I need to back them off...

PXL_20220911_000635161.jpg

Shot of the offset without the flares on

PXL_20220903_205051055.jpg
 
Nice and clean rebuilt T-18 showed up around this time. Freshley rebuilt and ready to go. Still a sloppy shifting T-18 but its a solid cast iron work horse that I have used in the past and never let me down.. I thought about going with a T-176 4spd as I have a nice one of those also and based on my intiial engine decisions running lower HP in the 200-250 range. Its much lighter and for lower HP applications this would have been the way to go. Not to mention I can almost put that one in place by hand compared to the T-18 which weighs a bloody ton!!! With the lighter T176 you lower your rotational mass and free up horsepower giving you more at the wheels. I have swapped a T-18 from a T176 in a higher HP application on a past CJ build and the power at the wheels was quite noticeable.
PXL_20220806_182530046.jpg

Drive shaft ujoint fresh up was due, shafts were in perfect condition just some new spicer joints - takes about an hour per shaft maybe a bit more if you want to clean and re-paint.. All you need are a couple sockets of the right size and a decent bench vise or hydraulic press ideallyPXL_20220904_202750250.jpgPXL_20230409_180811678.jpg


PXL_20230409_180750451.jpg
 
Around this time I started to check out more of the electrical system and what worked and what didnt. After a couple hours on the factory wiring harness I decided I didnt want to chase 40+ year older wiring ghosts and ordered a new Painless harness. I will say for anyone going through a restore and if you are like me and hate electrical problems do yourself a favor and budget for this! The harness was easy to install and repalced every wire in the Jeep except the column. I have zero electrical problems now and everything works as it did from the factory. I also refinsihed the dash and replaced all the lights and most of the swtiches, still waiting on the cables for my heater a new core and fan, went Omix for those parts.. still waiting on them..

At this stage I had dropped in the used 360 in and was planning to use it for the short term while I found a good shop to build it for me later.. I would install this motor 2 times before deciding to scrap the 360 and look elsewhere... Both times I had not fully inspected it and did not notice the broken exhaust manifold bolt as well as 2 broken bolts in the water pump/timing cover where he had taken off the alternator mount... I was not able to drill them out while it was in the vehicle .. this lead me to re-evaulate using this engine at present and I started talking with the guys down in Pheonix at BlueMonkey Performance.

PXL_20220924_164022735.jpgPXL_20220924_202140220.jpg
 
While I hadnt decided on the engine build, I did know it was either an AMC 360 or 401 so on to some exhaust. My first Hooker ceramic coated long tube fender well headers seemed to fall off the UPS truck and sure enough that was the last set I could find and they said they were discontinued of course.. I went with a set of uncoated long tube headman fender well then immediate took them in and had them ceramic coated in titanium color. I used 3" pipe straight through the Borla's. I wanted to keep it tucked in and clean. It was at this time that I also realized that the fender well headers dont clear unless you lift the body, I had forgot this from the last time I owner the same setup so also time to tackle a slight lift and repair the rotted body mounts.

PXL_20220917_000257958.jpg
PXL_20220922_220804924.jpgPXL_20220922_225724850.jpg

PXL_20220911_215137196.jpg

PXL_20220911_215141382.jpg

I dont seem to have any pictures of the repaired body mounts. I did the body lift and mount repair in 1 day start to finish. there were 6 mounts rotten out on the body, quite difficult to weld in some spots but you can do it with just the tub lifted.. This is one mount I didnt have to repair but showing the rubber pucks I used to raise it enough to clear the headers, they are about 1.5". Found them at Princess Auto, $6cad each, far cheaper than a "kit" Being Canadian I have also used Hockey pucks but hey are pretty hard and dont offer much shock absorbtion.

PXL_20220917_000341924.jpg
PXL_20220917_175129840.jpg
 
With the interior in much better shape it was time to decide on seats. I looked at OEM style's, low back's or Loredo type for the classic look but wanted something to hold my kidneys and also support a harness so I found these Corbeau buckets on JustJeeps.com. Their description claimed a direct fit and they are far from it. Upon calling them up and inquiring they informed me yes the description was incorrect and they would happily "sell" me an adapter which was not jsut an adapter but the entire seat base which wasnt going to work as I purshaed a drivers side tiltable base (rugged Ridge) so I could operate both drivers and passenger seat forward to access the rear. I also bougth a brand new slider which their adapter kit already contained so that was my last business with JustJeeps.com when they would not provide any money back on their false advertising. I contemplated retunring them and starting again but they are nice and already unpacked in the garage.

I built my own 1/4 adapter plate out of cold rolled steel and adapted them myself. Looking at what they did to adapt these seems dumb. My plate is an easy bolt on, adds very little height and is the most solid part, it could be done with 1/8 and still be stronger than the rest of the assemble.. I just had the 1/4 on hand..

I have not mounted the shoulder harnesses yet. Since both seats tilt forward so I dont want to secure them to the floor necessarily, still figuring this part out...

PXL_20220903_040510770.jpgPXL_20220903_031402080.jpg
PXL_20220903_023111796.jpg

PXL_20220903_023120590.jpg

PXL_20220917_221140018.jpg
 
I forgot the product shot for the Painless harness. I went with the full circuit version. I am replacing the plastic cable protection with nice nylon braid. The kit is super nice quality, every wire is stamped with a number and function.. For us old guys you'll need your reading glasses or magnifier to make them out but what a nice feature this is. It makes electrical work almost F... well bearable..

PXL_20220918_184327069.jpg
 
At this point it was around Jan and I needed to decide on an engine. After fighting with broken bolts in the head and block of the old 360 I decided to take it it and just have it built. I asked around and a local Calgary builder came up - Extreme Engine Development. I spoke to the builder and while he specialized in BB and SBC's he had experience with AMC and sid he could build a 400hp 360 if I went with the edlbrock aluminun heads. I took the motor in and left it to be built.. fast forward 4 months.. still no engine, still sitting in the same place I dropped it off. Problem was parts, there were none.. No heads in stock, no gasket kits in stock not to mention all the other internals.. who knows.. I spoke to the builder and we agreed this was going no where fast. I picked up the motor and had to re-group. I called another builder, of course same issues.. parts all come from the same place eventually..

I found a rebuilt (perfomance built) 401 about 1000 miles away from me.. Problem is it was a friend deal from the machine shope, no paperwork and the engine had been built several years prior, never been installed or run.. The price was reasonable considering where I ended but I decided not taking the gamble,

This is when I found BlueMonkey performance out of Arizona. they seemed to have good experience with AMC so we negotiated a turnkey 401. I went with the turnkey version which gave me a complete engine ready to drop in and I needed a new starter, distributor plus they bench run and do the intial break in before shipping. this was a big deal as I have brand new cermanic headers and I would have had to rig up the old cast iron stock manifolds for this. Running a brand new engine through the ceramic coating with ruin them. Also the bench run meant no surprises and they could test their build. The only thing missing were temp and oil sensors and a fan. I ordered it the second week in Jan 2023 and it was sitting at the receiving complany I use in Sweetgrass montana within 45 days Free shipping!!!

Here is how it arrived :)


PXL_20230301_221609576.jpg


PXL_20230301_222236498.jpg

PXL_20230301_222823342.jpg

Time to get cracking on the insall!

Here is where things got a little heated.. when I was pulling and installing the 360 the weather was still reasonable and I was using my tractor bucket for lift and had full range of movement.. When the 401 arrived it was a little chilly outside and the old '74 intl diesel jsut doesnt like to move in the winter so a hoist in the garage was how I would proceed.. I picked up a brand new hoist - 3tonne with a teelscopic boom.. First couple of attempts on getting it in failed and was fighting the hoist clearance.. I had to remove the front bumber to give me an extra few inches to seat the engine wiht the trans.

Funny story.. always check your pilot bearing fit.. I received a new one with the engine, not installed.. I thought that was odd but just pressed it in and moved on.. Pro-tip... check the bearing fits your input shaft before you spend 2 hours trying to hit the hole and wondering what the hell is going on.... I can laugh about it now :O


PXL_20230318_175845142.jpg
PXL_20230303_023812560.jpg
PXL_20230318_231259109.jpg
I didnt like the stock low mount alternator, it blocks the timing marks so I went with the highmount kit shown here.. One problem.. The head bolt they assume you have is 3/8 not 7/16 so I had to make some modifications and also find a replacement spacer which was not too difficult..
 
Darn forgot the story of the busted hoist cylinder.. While I was fighting unknowingly with a incorrect pilot bearing and had the engine hanging from the hoist in the bay, the hydraulic cylinder failed!! Luckily it didnt pop the seal just let go and I couldnt jack it up, down was the only option.. My garage ceiling could not support the weight and I didnt want to jack on the oil pan, plus the place I bought he hoist from didnt have any replacements, also they are 150 miles away from me!

I found a replacement on Amazon but now how to swap the cylinder??? luckily it was still high enough the fit 2 4x4 blocks where the motor mounts would be and was able to release the pressure to swap the bottle.. After a that brief hicup things were back on track..

PXL_20230315_232821499.jpg
 
Here is the build spec on the 401 from BlueMonkey:

The balanced rotating assembly (typically includes crankshaft, pistons, rings, connecting rods, rod bearings, and balancer) featured in this engine:

  • 3.680" stroke forged steel crank
  • 5.858" forged Brand New connecting rods with cap screws for added strength
  • 9.8 to 1 compression .045" Wiesco Forged pistons
More special features of this engine include:

  • Forged steel crankshaft ground and micro polished .020" mains and .010" rods
  • New Hydraulic flat tappet Isky cam .490" valve lift. 280 adv duration. 224 duration @ .050"
  • 58cc heads with 2.02"Int/1.600"Exh valves. Valves are stainless, under cut stems and swirl polished for improved flow.
  • Heads get vatted, magnafluxed, thermal cleaned, steelabrated, pressure tested for hidden flaws. Old exhaust gets counter bored, new harden exhaust seats installed for use with leaded or unleaded fuel. Drill, ream and install 11/32" valve guides in place of the 3/8" stock guide. 202 and 1.600 stainless valves with undercut stems that have been swirl polished are lighter and flow better than the stock heavy AMC valve. Both heads receive three angle valve job. Both heads milled to assure a good head gasket seal. Heads are machined so we can install screw in studs for Full roller rockers to make valve train adjustable. We install brass freeze plugs in both heads so they can't rust out in time.
  • New 1.440" high performance springs setup to match cam
  • New Screw-in rocker studs
  • New Full roller rocker arms
  • New Hardened push rods
  • New Hastings rings
  • New Double row timing set
  • New Brass expansion plugs
  • New aluminum aluminum 7531 Edelbrock RPM Air Gap intake manifold. This intake also has provisions for the oil filler tube and the popular 3/4" PCV valve
  • Oiling modifications include a front to rear steel oil tube - This steel tube takes oil from the front of the block to the rear of the block where it is needed most.
    New Milodon 8 quart oil pan with 9" rear sump that improves performance through increased capacity and strategically placed horizontal baffling for oil control and fits in all applications that originally had V8 engines (including Jeep)
  • All parts are painted separately before assembly for that show quality look
This engine comes completely assembled with Milodon 8 quart oil pan, timing cover, harmonic balancer, chrome valve covers, and an aluminum Dual Plane aluminum intake manifold.

This Is A Real Turnkey Engine​

This engine has been started on gas. The camshaft has been broken in and the valves adjusted. Carburetor and timing has been initially set, but should be checked after installing in vehicle.

Also included and installed on engine:

  • 4 barrel HR680VS Quick Fuel carb
  • Mechanical fuel pump
  • Chrome air cleaner
  • Fuel filter
  • Electronic MSD "Ready to Run" distributor and coil with matching cam and dist. gears.
  • Spark plugs and spark plug wires
  • New Gates water pump
  • New starter
  • New water outlet and thermostat
  • Stick shift flywheel as needed for your application with Luk clutch kit
  • This engine has been Dyno run on gas and run. Carburetor and timing has been initially set, but should be checked after installing in vehicle.
 
With the motor finally in place on to wiring cleanup and routing, removal of the old ignition module based on the 1 wire distributor. Both of the alternators I had turne out to be bad. I replaced with the Chrome powermaster 110amp single wire which is nice, you do not need the power wire or exciter with these and keeps your wiring to a min. I was nicely surprised when I powered everything up.. every last light and switch worked perfectly except the backup lights... Right now backup indicator turns on my brake lights so my switch is working I just have something crossed in my housing I believe. I did not buy OE replacement rear housings, they are generic so they had no pigtails and I just figured out their basic wiring scheme, must have missed something.

I got everything under the hood finsihed and time to start up for the first time, it fired up immediately! then panic set in just as fast as it started up.. There was coolant coming from the passenger side read of the head. I checked all my connections - heater hoses etc.. and could not find the leak. It looked like the head was cracked and it was coming stright out the back side.. I shut down immediately, looked for coolant/oil crossover and there was none.

I wiped all the coolant I could see off and tried chasing the trail with a dry blue shop towel (they darken nicely when wet) . When I wasnt seeing coolant in the oil I started up again, this time it looked like the frost plug... ugg did I have to pull this engine again?? This would be pull number 5 or 6.. lost track.. inide of 8 months... which by this stage wasnt a big deal, I have it down to under 2 hours so its like an oil change now for me!

During the coolant issue I also developed a fuel starvation problem and it appeared the Carter mechanical was failing to pump fuel (sometimes) and it was draining the carb bowls then stalling.. I would let it sit for a bit and it would start again, run for a while but eventually die out with empty carb floats... Something had to be wrong with my pickup or lines.. after several hours I finally decided to drop the tank as I was feeling resistance when trying to blow air by mouth back through the line... As I was gearing up to drop the tank I spotted the issue. I had left enough slack in the rubber line to allow the tank to drop enough to reach above, all good until I pinched the line on the front side of the tank when I installed it. My guess is that enough fuel was squeezing through and filling the line, enought to load the floats. After the burn down it would starve out anbd need to sit while fuel trickled by the pinch. Harder throttle pulls I suspect might has sqeezed it more... It burned out the pump included with the build which is a major drag. They have been discontinued for a while and have boittom feeds that are setable so you can index your inlet and outlet fittings for the direction you want.. I have gone back to a spectra mechanical with intenet/outlet ontop.. major pain but its the only pump not made in China these days it seems!

Once I sorted the fuel issue, back to the coolant leak. Once I was able to run it again I found my heater hose fitting on the back of the intake was the culprit. Not the hose or NPT connection but a small crack in the tubing right around the nut and it was able to sneak right across the intake bolt and slip down making it look like the head was leaking!

You can see the drop of coolant right next to that ground line.. not what you want to see on a brand new motor!!!


PXL_20230401_230450488.MP.jpg

What was interesting was when I was laying under it trying to see the leak I couldnt see the greenish coloring on the head (the coolant trail) . I snapped pictures and thats when I seen the coolant running down the block. My eyes just couldnt register it live I guess.
PXL_20230402_230720932.jpg
 
Now that I solved the coolant leak and Alternator problem on to some tuning and see how the enginer is doing at 3700 feet abovce sea level.. it did not come jetted or tuned for this alt clearly!
PXL_20230411_005008538.MP.jpg

it was running super rich.. time for some re-jetting! The turkey engine came with a QF Holley 650. I happend to have a Brawler 650 brand new in a box so I decided to leave the QF and re-jet the brawler, it looked a lot nicer in black and red.. plus its a cheaper carb and I havent touched a carb in at least 20 years so I needed a practice run!

The Holley 650's come with a Primary jet size #70 and secondary of 74 which is supposed to be a sea level calibration. According to Holley its 2 jet sizes for every 1000 feet so I dropped the brawler to P: 64 and S:68.. got a much cleaner burn but still on the rich side..
PXL_20230411_004949717.jpg

I bought a complete second set of Autolite 3924 cheap copper plugs to cycle a new one into Cylinder 1 while tuning so its easier to read between adjustments.

Be careful with the jets, make sure your screwdriver is fat enough toi just fit the slot.. The brass is easily damaged and if you are re-jetting while the carb is installed I would recommend buying the tool for this. It keeps the flathead in alignment when you are dealing with teh secondaries in the rear, just hard to reach head on..
PXL_20230414_014056732.jpg

I also swapped the 13" round breater for the oval due to clearance issues on the throttle linkage.

PXL_20230414_024312152.jpg
 

Attachments

  • PXL_20230414_014056732.jpg
    PXL_20230414_014056732.jpg
    193.2 KB · Views: 8
During the tuning of the carb I was noticing temp creep at idle while I was setting the carb. I did a short test drive and it was definately running a lot hotter than I expected since it was in the 60's here outside or around 15C. I would hit 160, thermostat would open but it would keep climbing to over 200.. Time to question the cause.

If you are at idle with creap you are likely to have a airflow issue, or possible rad undersize. If you hit some speed and cause some wind you should drop, if not you have a radiator or otherwise coolant restiction has been my approach. In my case I was seeing creep at idle as well as creep when doing 30-40mph and on the throttle just a little... I stepped back and looked at my setup again. It was possible the rad was the issue as I went with a cheaper generic made in china 4 row.. I tried very hard not to buy anything made in China for this build but sometimes this is really hard and this one was around $175-200USD so I figured I would gamble on it, my budget was getting pretty crazy at this point!! I left the rad alone and went with the much simpler cause which was the fan. I had the 5 blade 16" flexalite on it you seen in a previous picture and I grabbed a Flex-a-lite 18" 6 blade from the local hotrod shop for $35US.. cooling issue resolved! Now it warms to 160, opens the stat and just sits at 160.. at speed and some throttle you see a slight bump to just under 170 and then immediate drop to 160 again. This was the only option they had for me and it is a steel fan not aluminum so its on heavily side. I have ordered a 18" aluminum flex fan as the permanent solution.


PXL_20230418_222748349.jpg
 
Got the hard top back on now that its moving on its own! I had the original fastners but wanted a thumbscreww style and found these, decent quality, cheap and work great!

hardtop fasteners.jpg

PXL_20230419_014011269.jpg


New issue I discovered when I put the top back on.. With the 33" swamper on the spare tire carrier the canopy door doesnt clear and you cant open it. I have not addressed this problem yet, considering options at this point if anyone has any creative thoughts.. I have seen the aftermarket fold down tire carriers and may look at making my own style of fold down rather than the OE swing...

Almost forgot to add.. Yes that exhaust gets a little hot on the floorboards and some heat shielding is coming. I have a supply of 1/4 aluminum I am goign to use to run along top of the exhaust, secured to the body mounts which will kill any heat soak in the floor. there are a couple other spots that need some new shielding when using the fenderwell headers, starter cable needs shielding as does the Clutch bell crank or yuou boil your grease out on the hot days!
 
Right after snapping this picture I got in to pull it back to the garage, and the passenger floor board was covered in coolant, heater core let go on me.... a new Omix core w/ new fan is on order and I think that pretty much catches up to where I am at now!

Plans for the weekend:

Finsihed replacing the plastic wiring tubes with classic braid
Re-jet the Quick fuel 650 and finish of the carb tuning
fabricate the exhaust heat shielding
cleanup the underdash wiring. During testing I have left everything accessible. I have made the mistake in the past of being over confident and making it all look nice only to have to unravel it due to some issue!
 
This is one heck of a great writeup!
It's great to follow all you have done and have documented and you take great pics...
 
This is one heck of a great writeup!
It's great to follow all you have done and have documented and you take great pics...
Thanks! I regret not taking more pics along the way of the before state or fab steps but I tend to get in a zone out in the shop, hours slip by and I forget all about my phone..
 

Jeep-CJ Donation Drive

Help support Jeep-CJ.com by making a donation.

Help support Jeep-CJ.com by making a donation.
Goal
$200.00
Earned
$0.00
This donation drive ends in
Back
Top Bottom
AdBlock Detected

I get it, I'm a Jeep owner and ad-block detectors kinda stink but ads are needed on this site. This is a CJ site, all the ads are set for autos (some times others get through.) I cannot make them just for Jeeps but I try.

Please allow ads as they help keep this site running by offsetting the costs of software and server fees.
Clicking on No Thanks will temporarily disable this message.
I've Disabled AdBlock    No Thanks