Build Thread 1979 CJ7 Rapid restore - 1 Year build from tired and rusty to all go and some show..

Build Thread 1979 CJ7 Rapid restore - 1 Year build from tired and rusty to all go and some show..
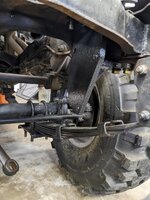
Managed to get a few hours in tonight to do some exhaust heat shielding. The fender well exhaust with a 2" body lift is still within about 1"-1.5 inches from the floor pans so it gets a little warm if you are idling around. I didn't need to use 1/4 aluminum and could have gone half that but the pieces I got were traded for a case of beer so 1/4 it is. They were also already cut almost perfectly for what I wanted. I used three of the body mounts to secure it. Btw for those who haven't tried it, Cutting aluminum with a zip cut disk is terrible!!!

PXL_20230908_011917979.jpg
PXL_20230908_033837485.jpg
PXL_20230908_033821938.jpg
 
Btw for those who haven't tried it, Cutting aluminum with a zip cut disk is terrible!!!
Yea, clogs like crazy. There are special disks for non ferrous metal or use one with teeth. ;)
 
update on the heat shielding.... While fabricating the shielding , i took some time to shim the drivers side body mounts a little as it was slightly off due to worn down factory body mounts. I added the new 2" pucks on top of them in order to clear the fender-well headers during the initial build up. I noticed the 1/2 shim I used (+ the 1/4" aluminum) was putting too much strain on the clutch and steering shaft so after getting all re-assembled I had to tear it all down again and remove the shims! I should have checked this while I was lifting and lowering the body!

Aside from that minor hiccup the shielding works very well. It should, its at least twice as thick as it needs to be! :)
 
Mine came with a shield from the factory in between the muffler/cat and body. Eventually the cat and muff went bad and I had them replaced. I didn’t notice right away that Midas didn’t bother putting it back on and by the next day it was scrapped and gone. Worked pretty good.
 
Mine came with a shield from the factory in between the muffler/cat and body. Eventually the cat and muff went bad and I had them replaced. I didn’t notice right away that Midas didn’t bother putting it back on and by the next day it was scrapped and gone. Worked pretty good.
I think with factory exhaust you get a bit more distance from your floor boards so the shielding was likely just an extra precaution.. on fenderwell headers with the 2.25" body lift, the header collector is about an inch from the floor and it heats up quite a bit!
 
Well this was a slippery slope. I ordered a Borgeson 920 steering shaft as was going to slowly work my way through the steering until it was all freshened up.. well one thing led to another which lead to several broken steering bracket bolts which is now going to lead to a bunch of drilling/tapping/swearing and bloody knuckles! Pics to follow, the anodized red turned out nice on the shaft though!!

PXL_20230925_010227227.jpg
PXL_20230925_010210574.MP.jpg
 
  • Thanks for the Post!
Reactions: CJ
Well this was a slippery slope. I ordered a Borgeson 920 steering shaft as was going to slowly work my way through the steering until it was all freshened up.. well one thing led to another which lead to several broken steering bracket bolts which is now going to lead to a bunch of drilling/tapping/swearing and bloody knuckles! Pics to follow, the anodized red turned out nice on the shaft though!!

View attachment 86503
View attachment 86504
purdy
 
Things slowed to a stop on my build. I blew a knee out which has laid me up for a while and keeping me out of the shop. So in sticking with the title of my build thread, I feel I should close this one off as "This is what I was able to accomplish in roughly a year and this is what it cost me!".

So here goes my closing high level summary:

  1. Obtain useable rolling chassis - xx hours!!!! $6000CAD
  2. Body work - Rust removal, floor pan patches, rocker panel repair, body mount repair - 250 hours, $500CAD
  3. Interior restore - New custom seats, window seals, new gauges, lights, switches, HVAC repair, heater core. fan motor, harnesses- 150 hours, $4000CAD
  4. Tires and Rims - 8 hours of driving to pickup - $3500CAD
  5. Transmission - Had a shop re-build a T-18, cost me 8 hours of driving and $1900CAD
  6. Engine - Turnkey Crate engine, time to drive to Montana to collect plus install and tune 80hours - $20,000CAD
  7. Drive Train - Drive shaft u-joints, brake fluid flush and bleed, differential flush/inspect and re-seal, speedo cable - 16hours $300CAD
  8. Electrical - Painless harness install, replace all markers, head and tail lights 35hours - $2000CAD
  9. Fuel tank - New Poly 15G tank - $550CAD - 15hours
  10. Rear bumper - 4 hours $350CAD
  11. Exhaust - 2 sets fabricated 25hours $1000CAD
  12. (parts on hand but install not completed yet) Steering - HD shaft, new gear box, HD mount, Lares chrome PS pump 20hours $1400CAD
  13. Areas that do not require immediate attention and have not been touched:
    1. Front/Rear Differentials, axles, hubs aside from cover seals and oil
    2. brakes - good condition as-is and recently replaced by PO
    3. steering linkage, tie rods, ball-joints, leaf springs/suspension -in good shape and looked to have been recently replaced by PO
    4. Glass - everything was good and nothing needed
  14. Total: 611hours @ $41,500CAD
I was trying to give a rough idea of what each major section of the build cost me along with how many hours I estimate I put into each part. Keep in mind these are my times and not necessarily what it should take a competent installer. I didn't pull out my receipts but I am pretty close aside from perhaps a bunch of small things from nuts/bolts/washers, new v-belts, test spark plugs used for tuning, new carb jets.. that stuff all adds up over the life of the project.

What's up next?

  1. Dana489 upgrade from East Coast Gear Supply (after reading TSB8C's post on his recent upgrade!)
  2. New full Tub - Color/finish undecided at this time
  3. Complete tear down - sandblast and powder coat frame
  4. Second set of rims/tires for longer road trips
  5. Upgrade to 21G fuel tank
 
Interesting build. Life happens like that.
 
I said I was wrapping this up but I dragged my gimpy knee out to the garage to get this steering finished that Iisted above as incomplete.

Installing the following:

Borgeson HD 920 shaft
Cardone reman gearbox
Borgeson reman power pump
Edelmann lines high and low
Rugged ridge HD one piece mount
Omid steering wheel and horn
Rough country HD stabilizer

I initially ordered the Chrome Lares pump from summit, it's suoer nice but the return inlet is not compatible with the mounting bracket. I didn't see a easy way to modify it and sent it back, replaced with a rebuilt Borgeson (came with a new cap)
PXL_20231112_192247368.jpg

I broke both shackle bolts and the third inside bolt as well. The nut inside the frame broke off which made me stop and curse for a min or two. There is no access window near it so I drilled straight out the top of the frame and ran a long 7/16 bolt through. I had enough on each of the other shackle bolts to weld a nut on and twist them out with the heat of the weld and a couple trys each.

Test fit things in stages. The instructions said you may need to file a hole or two and I had to. This mount is nice, not sure about the little add-on side plate, not using it as the holes are really far off and doesnt look like it does anything.
Loose fit each bolt as you go until they are all in a few turns and then pattern then right.

PXL_20231123_193137326.MP.jpg

PXL_20231123_193143086.jpg

PXL_20231124_031727619.jpg

Up top, new high pressure and return lines. New aluminum pulley.
PXL_20231124_031652424.jpg
PXL_20231124_031730810.jpg
PXL_20231124_031718185.jpg

PXL_20231124_031710521.jpg

Should finish the rest of tomorrow and test and tune on rhe weekend.
 

Attachments

  • PXL_20231123_193143086.jpg
    PXL_20231123_193143086.jpg
    169 KB · Views: 6
  • PXL_20231112_192247368.jpg
    PXL_20231112_192247368.jpg
    186.8 KB · Views: 6
Personally I think those flex fan are like stickers, some look nice but are as useful as tits on a bull. I'd get a good flex fan, powder coat(I've got one powder coated for my sbc)
Flex fans look pretty, but are not near as efficient. Great job on all the other upgrades and mods.
 
Personally I think those flex fan are like stickers, some look nice but are as useful as tits on a bull. I'd get a good flex fan, powder coat(I've got one powder coated for my sbc)
Flex fans look pretty, but are not near as efficient. Great job on all the other upgrades and mods.
The one I have on it now is a flexalite 18.25" I have a flexalite steel, not so flexible lol. They both keep this motor at 170 even on the hottest day I've run it, up around 32-34C ambient temp. I had a smaller 5blade at first, 16" . That did not cut it at all!
 
I dragged myself back to the shop this weekend and managed to get the steering re-assembled. I took it for a quick test drive and what a difference!!

The horn button could be better, it fits loose.. Horn works ok but feels a bit cheap.. Still better than the original I had. I would love to find an original Laredo wheel. I found one a year ago but they seller wouldnt ship :(

PXL_20231127_002335739.jpg

PXL_20231127_002236070.jpg
 
while I wait on yet another surgeon to chime in on my tore-up old Hockey knee, I cant stay out of the garage! I have to be a lot more careful crawling around but I am learning to work around my limitations!!

I wasn't totally happy with the offset on the first set of Chrome ProComp rims I used. The aluminum specs are 15x8 @ -12 offset which produces this stance. The 33" swampers rub on the springs at full turn radius by about 1 to1.5 " (ish) .

(To save you from reading back up through the build this is a factory 79 narrow trac for reference - AMC20/Dana 30)

PXL_20231207_213707337.jpg

I ordered a set of Steel proComps - 15x10 @ -44 offset and here is what I get now >

PXL_20231207_214732259.jpg

PXL_20231207_214749473.jpg
PXL_20231207_233424568.jpg

I was not a big fan of the black but it was all I could get and they were pretty cheap - $117CAD . I havent taken it out for a test run yet to compare how it drives. If it hasn't messed with anything eventually I will take them off and coat them either white or gun metal perhaps. Might as well wear the paint off first!

Its was too cold to stand outside and take a rear picture, waiting for the sun to get a bit higher! I also havent checked the turn radius to see if this has cleared the rub. I only had enough go to get the tires on and it off the jacks yesterday...
 
not a bad price for the wheels, and I actually like the black better, wife on the other hand likes the shiny chrome
 
like you, bad knees amongst other ailments, but I have to get off my A BAD WORD, I want a V8 Jeep bad lol
 
Mine is Silver / Greyish with original white wheels. I like black or white wheels with that combo. Yours looks good to me.
 

Jeep-CJ Donation Drive

Help support Jeep-CJ.com by making a donation.

Help support Jeep-CJ.com by making a donation.
Goal
$200.00
Earned
$10.00
This donation drive ends in
Back
Top Bottom
AdBlock Detected

I get it, I'm a Jeep owner and ad-block detectors kinda stink but ads are needed on this site. This is a CJ site, all the ads are set for autos (some times others get through.) I cannot make them just for Jeeps but I try.

Please allow ads as they help keep this site running by offsetting the costs of software and server fees.
Clicking on No Thanks will temporarily disable this message.
I've Disabled AdBlock    No Thanks