Build Thread Mike's 1986 CJ7 (Mid Year) Rebuild

Build Thread Mike's 1986 CJ7 (Mid Year) Rebuild
CJ7_Heater_Rebuild_36.jpg
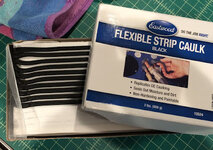
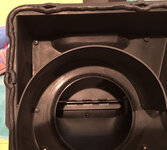
Decided to use Eastwood Flexible Strip Caulk (also known as "dum-dum") instead of RTV to attach the front and rear panel of the lower heater box. May use it to seal the Upper heater unit to the cowl as well. Does not harm paint, stays pliable and fills gaps well.
CJ7_Heater_Rebuild_37.jpg
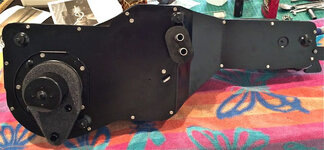
Lay out the strips in the middle of the seam and around each screw then screw the back panel to the front plastic housing. Fill in with more caulk where there are gaps. I used a wet finger to smooth out the joint much like household caulking.
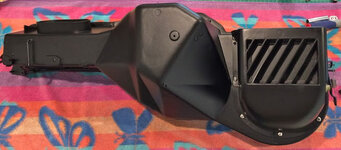
CJ7_Heater_Rebuild_38.jpg
Finished front.

CJ7_Heater_Rebuild_39.jpg
Finished rear.

I still have to make the foam gasket that will fit between the upper and lower heater unit as an air seal.

Next will be the upper heater unit.
 
Decided to fab up some new brackets for the tool box. I previously used some small diameter 2" standoffs mounted to the rear seat mounting holes… it left the box too "teetery"…

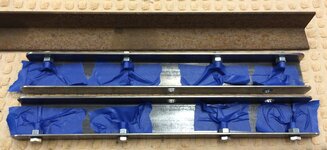
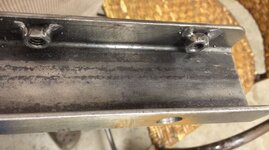
These are 15" x 2" x 1" (1/8" thick). I've had them bolted into the bed and they seem solid.

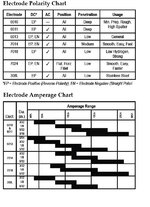
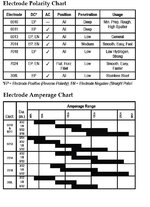
Anyway… first day with the new welder and with 45 years since my last weld, I'm happy with these tacks. Used 6011 3/32 rods set at DCEP 85 amps.

I tried 7018 3/32 set at DCEP 85 amps, but couldn't get any tacks… kept sticking. I was able to run some decent lap beads with the 7018 after some practice.

Toolbox_Brackets_01.jpg

Toolbox_Brackets_02.jpg

Next step paint...
 
Last edited:
Nice!


Sent from my gas grille using Tapatalk
 
Spot welds look good, turn your amps up on the 7018 to the 120 range, man your heater looks brand new, did you paint the plastic? What did you use?


Sent from my iPhone using Tapatalk
 
Spot welds look good, turn your amps up on the 7018 to the 120 range, man your heater looks brand new, did you paint the plastic? What did you use?

Thanks.

I was using 85-90 amps with the 7018 3/32 rod. I'll try raising the amps and see what happens. Thought 120 amps was more for 1/8" rod.

Sanded the plastic box with 180, then wiped with lacquer thinner, then used Dupli-Color low gloss black ceramic engine enamel.
 
Hmm been a while you might be right on the amps, best to just go up and down til you find the right amps for you and your machine


Sent from my iPhone using Tapatalk
 
I don’t have a stick welder yet, but I’m savin’ this for just in case...


Sent from my gas grille using Tapatalk
 
Uh oh…

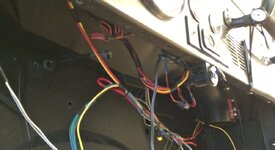
I really deliberated on removing the upper heater unit. But did want to look into what is causing the cable linkage to hang up.

After much finagling, I was able to get it out without removing the dash. Tip: Patience.

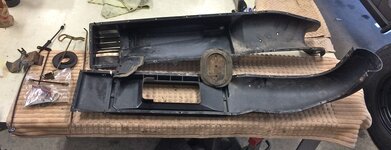
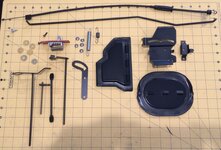
After drilling out 37 rivets… here it is in all its disassembled glory.

Ordered some aluminum pop rivets and aluminum washers for reassembly. All parts are currently bathing in Evaporust.

CJ7_Upper_Heater_Rebuild_14.jpg
 
Last edited:
Air box rebuilt and reinstalled.

CJ7_Upper_Heater_Rebuild_15.jpg

CJ7_Upper_Heater_Rebuild_23.jpg
Used strip caulk (dum-dum) and aluminum rivets to reassemble the halves back together.

CJ7_Upper_Heater_Rebuild_29.jpg

CJ7_Upper_Heater_Rebuild_28.jpg
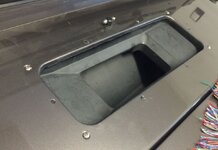
Ended up using strip caulk under the cowl opening to water seal the air box. The stuff never hardens and is completely waterproof. The old rubber seal was torn. This thing will never leak!!!

Full write up here...

Now to get the lower heater unit reinstalled...

hhmmm... maybe I should give the windshield washer a go...
 
Last edited:
I always love looking at your disassembled pictures


Sent from my iPhone using Tapatalk
 
Ran a new 5/32" ID wiper/washer hose (Napa $.50 per foot) from the tank to the nozzle nipple. Got some snappy new orange Rain-X washer fluid too.

Noticed, after the fresh air box went in that the washer nozzle is a tad loose. Dangit...!!! Wondering if I can get up there with a small wrench and give that nut a quarter turn now...

Also wondering how many more trips back under that dash my back can take...
 
CJ7 Fuel Tank Fill & Vent Hose Replacement

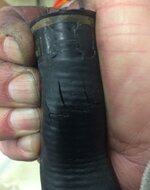
When installing the new rear bumper I noticed that the fill and vent hoses were hard and cracked.
Fuel_Tank_Hose_02.jpg

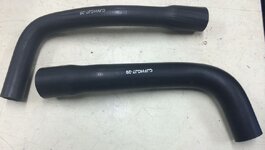
Ordered a new MTS set from Barney's Jeep Parts on ebay.

Fuel_Tank_Hose_01.jpg
Fuel Tank Fill Hose • MTS CJFHCJ7-20
Fuel Tank Vent Hose • MTS CJVHCJ7-20
These are for the OEM 20 gallon plastic tank.
 
Now that should be interesting as well


Sent from my iPhone using Tapatalk
 
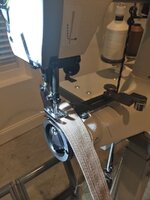
Had to open the Cowboy CB3200 to drop the presser foot bar for the fabric feed group (usually set for leather). Installed the presser foot, needle feed dog and lower feed dog. Here I'm setting the stitch length, stitch tension, and presser foot pressure.

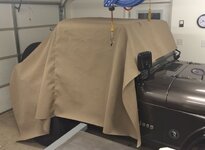
Jeep_Cab_Cover_03.jpg

Traded a guy some old church key can openers for the Sunbrella… about $15 worth. $10 for the thread.
 
Last edited:

Jeep-CJ Donation Drive

Help support Jeep-CJ.com by making a donation.

Help support Jeep-CJ.com by making a donation.
Goal
$200.00
Earned
$0.00
This donation drive ends in
Back
Top Bottom
AdBlock Detected

I get it, I'm a Jeep owner and ad-block detectors kinda stink but ads are needed on this site. This is a CJ site, all the ads are set for autos (some times others get through.) I cannot make them just for Jeeps but I try.

Please allow ads as they help keep this site running by offsetting the costs of software and server fees.
Clicking on No Thanks will temporarily disable this message.
I've Disabled AdBlock    No Thanks