Build Thread 78 CJ5 Farm Find

Build Thread 78 CJ5 Farm Find
Well, at least you know the ground at that light is good but parking lights and directionals use a different filament within the same bulb. Pull the bulb and check it/change it out. If that doesn't work, check the condition of the bulb socket and then feed wire for corrosion or breaks.

I was wondering about that as I was looking at it last night.

Sent from my XT912 using Tapatalk
 
Let me know when your ready for that upgrade harness. Also Ground your grill. Get a 10 or 8 gauge wire and run it from either you negative battery post or where your ground wire that goes to the motor to the grill. Clean all the paint off the spot where you bolt it to so you get a lot better ground for your you head light, blinkers and marker lights. Your marker/ground lights ground out through the screws that go through your lenses into the housings then into yout grill. Make sure they are all clean and making good contact. Also look into the connections between the stock harness and the lights. Alot of time they get brittle and break or corrode.
 
My rear lights worked, but turn on the turn signals and odd things happened. I notied a stray wire that should have been a ground floating around. After returning it to ground my problems went away. It sounds to me like you have a dodgy ground as said above.
 
My rear lights worked, but turn on the turn signals and odd things happened. I notied a stray wire that should have been a ground floating around. After returning it to ground my problems went away. It sounds to me like you have a dodgy ground as said above.

I wouldn't be surprised. I've got all kinds of dodgy things going on with wiring hanging all over the place. Gauges not connected, bulbs missing, sensors not hooked up.

Sent from my XT912 using Tapatalk
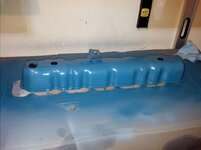
 
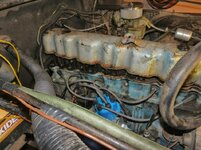
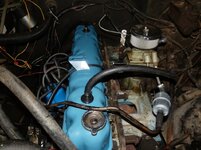
So the next thing I'm tackling is the valve cover and gasket. It had been leaking some and seeping oil. Plus it needs to be painted. The whole engine needs painted but I'm not ready to pull it yet.

Here I finally got the seal to break and the cover to come free.

PA230080.jpg

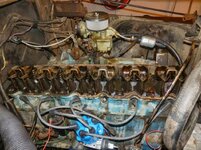
Here's the passenger side. No sludge so that's good!

PA230083.jpg

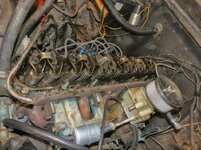
And here's the driver side.

PA230084.jpg

Tomorrow I'll finish cleaning it up and prep it for painting.
 
Nice project. Keep up the good work!
 
Tomorrow I'll finish cleaning it up and prep it for painting.

Ok, so it wasn't quite tomorrow, but it did get done.

IMG_20131031_080822.jpg

And finally got the new cork gasket to stay on long enough for me to get it on the engine.

PB020092.jpg


I never did get the timing set right. I don't have a light and haven't borrowed one or paid to have it done. I was having occasional backfires, which I know can be timing too far retarded and also fuel mixture too rich. I advanced the timing a bit till it was on the edge of running poorly. Then adjusted the carb mixture as best I could. I think I did have it set way too rich. Took it for a test drive and didn't detect any really. :chug: Have to do some more driving to be sure but I think things are looking better. :)

I ordered an oil pressure gauge that I'm looking forward to putting in. Would be nice to actually see what kind of pressure I'm running.
 
Brakes

I haven't got around to putting the oil pressure gauge in yet. I did drive it a bit last weekend before winter set in here. We had a weekend in the 60s and sunny so it was nice.

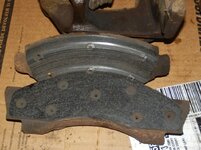
After that I garaged it for the winter and decided to tackle the brakes. I managed to get the calipers and rotors off. It looks like at some point the caliper stuck and started wearing uneven. Because of that the pads look like this.

PB130094.jpg

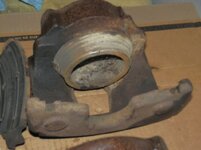
This is the condition of the caliper.

PB130095.jpg

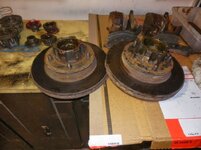
This is the outside of the rotors.

PB130100.jpg

And this is the inside of the rotors.

PB130098.jpg

My local repair shop said no to turning the rotors and I had already decided to put in new calipers since they are so cheap.

I've still got some cleaning to do and I want to continue taking it apart so I can get to the spindle bearing and check the joints on the axles. I've decided that I'm going to replace the bearings since they look a little worse for wear and are most likely the original. I don't have an up close picture of them.

I'm in the process of tracking down who has the best prices on bearings, brake pads, calipers and rotors. Hopefully I'll be able to start putting it back together in a few weeks. Maybe even have it back together for Thanksgiving, although that will be pushing it I think.
 
Spindles off

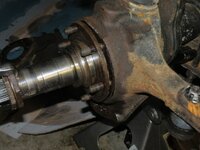
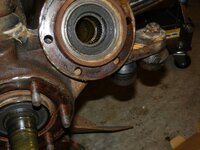
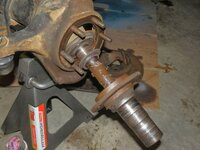
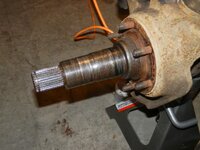
After several attempts and lots of application of PB Blaster I got the spindles off. One side popped off all on its own with just application of blaster. Couldn't believe that after the trouble the other one gave me. After trying once with a puller and deforming the spindle nut I tried with a chisel and hammer to get in between the knuckle and the spindle. No dice after lots of hammering. I decided to give it a try with a different puller and multiple spindle nuts and finally got some success.

PB210111.jpg

PB210112.jpg

This side looks pretty clean in spite of the trouble it gave me coming off. Bearing doesn't look too bad. I'll have to see for sure when I clean it up a bit.

PB210114.jpg

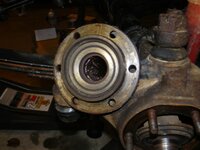
The other side that came off so easily is a different story. This is what I found inside.:eek::eek: I can't believe the wheel was even working at all!

PB210115.jpg

PB210116.jpg

This side needs a little attention on the spindle too.

PB190108.jpg


I've got some cleaning and some repair to do before I put this all together. I've got a parts list together and have started picking things up locally but haven't ordered the rest until I do a little cleaning in here and determine what exactly needs replaced.

I'll hit these with a wire wheel and clean them up. Maybe paint them. Not sure yet.

PB190109.jpg

PB190110.jpg


It's been interesting so far.
 
Steering

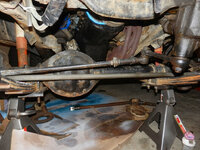
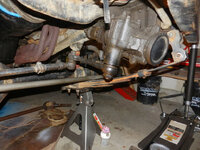
So I was doing some reading about the steering and common problems and stumbled across posts about bumpsteer and flipping the tie rod and drag links. It got me wondering about my Jeep as the description and definition of bumpsteer is what I'm feeling. Went out to check and sure enough, the PO cranked the drag link up to the stock pitman arm after they put in a small spring lift kit (2.5 inch maybe?).

PB250118.jpg

PB250119.jpg

So I guess at some point I'll be working on flipping both the drag link and the tie rod. Hopefully doing that will improve the steering. I don't have a stabilizer either, and I know that will help. I think the steering coupling is also loose and could use replacing as well. I'll just have to tackle all that a bit at a time.

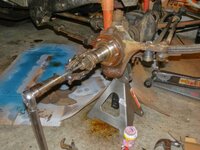
Right now I've got to finish up the front brakes/bearing rehab though. If you look close in those pictures you can see the axle shaft in the background. Over Thanksgiving I'm going to spend some time cleaning things up preparing to put it back together.
 
I dont think you need a drop pitman arm for only a 2.5 in lift. Ive had 2 different ones with that size spring lift and aftermarket shackles (on one) that added another .5 and never used a drop pitman arm. Im not a believer in steering stabilizers either.

Most of the time steering problems are caused by worn out parts or poor steering geometry. Your set up doesnt look to be way out of line. I ordered the kit below for mine and its really nice. Jeep-CJ Forums - View Profile: JR74CJ5 turned me on to it. My Cj has about 5 in of lift with a drop pitman arm. I put this kit in and dont even have the stabilizer with 35 in tires. My caster is off a little but it still handles way better then the old stock parts it had. It'll work if you decide to use a go fer it flip kit as well. Im doing that but need a stock pitman arm to use for that conversion.

Amazon.com: Rugged Ridge 18050.81 Complete Heavy-Duty Tie Rod and Drag Link Kit: Automotive


Heres what mine looks like right now. If you look at it it seems to have close to the same geometry as yours does.

steerupgrade4_zps706a2f90.jpghttp://s39.photobucket.com/user/Cjpete85/media/81 CJ7/steerupgrade4_zps706a2f90.jpg.html
 
Thanks, Pete. I'll have to check that out tonight, and you're right yours is close to mine. Perhaps I should check out the steering shaft coupling before trying to tackle the drag link geometry.

In any case I need to get my front axle back together first.
 
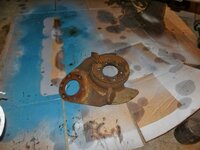
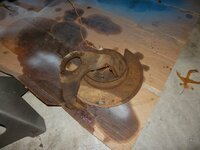
Hasn't been much going on with this. Since the weather has been pretty cold for the most part I haven't spent a whole lot of time on it. I do have all the parts to put the front axle back together but time hasn't been there. I have caught a few hours here and there and have cleaned up the brake dust shields and caliper brackets. One of the caliper bolts had broken off some time in the past so I've got to try and remove it from the bracket. I've painted the shields and one of the caliper brackets.

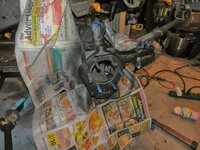
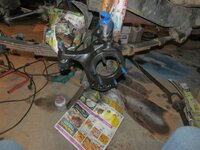
I've also cleaned up the steering knuckles and have put a coat of primer on them.

9JcafhCZspkiAa4wTdDbv1YP-crOauPqM00k=w1165-h874-no.jpg

PC290133.jpg

I'll probably work this week on that bracket and finishing up the steering knuckles with a coat of paint. After that will be removing the spindle bearings (one is destroyed) and getting them cleaned up.

I hope in the next month to be able to get the time to put it all back together so I can take advantage of the odd 50-60 degree day we get every once in a while.
 
Finally got over the hurdle. I had been working on this broken bolt in the caliper bracket. Had been drilling and trying an easy out. Finally gave up and drilled it out further and sent a tap down it. Turns out that's what was needed. The tap worked it out.

P1040135.jpg

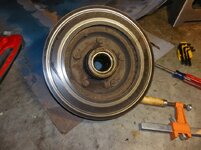
I also got the bearing races punched out of the hubs. The grease isn't completely cleaned out but that shouldn't be too hard to finish up.

This was all done while waiting for the antifreeze to mix and distribute. Had to make sure the CJ was protected during this deep freeze. So now that its taken care of I can clean it up and finish the painting. Then on to the spindles and wheel bearings.
 
Yep, those spindles can be a real project to remove. When you re-assemble, put a film of anti-seize on the surfaces (this is what I did). Also note, the seals for the inner bearing are designed with a lip that goes in a specific direction.
 
Finally got weather good enough to get back to this. I have all the parts and most of the work has been done to be able to start getting the front axle together.

Some time over the winter I replaced the u-joint in the driver's side axle shaft. That desperately needed replaced.

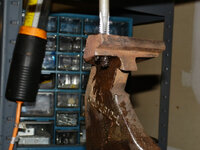
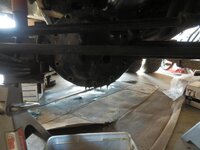
This weekend I cracked open the front differential cover to check it out. Took some serious hammer work to crack the seal on the cover and in the process rolled the cover edge over into the sealing surface. Had to file that down to smooth again.

Liquidy sludge came dripping out.

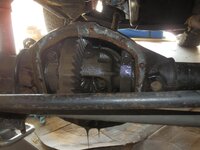
r9j9lu5.jpg

And not looking too awfully bad. It was still a liquid so I'm encouraged by that.

3hwahTV.jpg

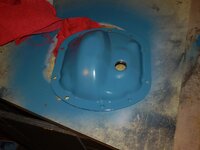
Since I had it off I thought I'd clean up the diff cover and paint it.

PeyWFvO.jpg

I'm trying to decide now if I go ahead and tap the vent hole while I have the cover off. I think I will, I just have to go buy the tap and the threaded barb.

After that I start putting the axle back together. I still have to seat the new hub bearing races but once that is done I can pack the bearings with grease and start reassembly.
 
Theres no vent hole in the top of your axle?

There's a vent hole, but that's all there is. No nipple or line attached, so I've got to add something to get a vent line in it that doesn't allow everything in.

I've read that some people have tapped that hole and put in a threaded hose barb for the vent line. I measured it and it looks like its just a hair wider than 5/16, smaller than 3/8. If I can find that barb somewhere that fits that size that's my plan.
 
You might try running a 1/8" NPT tap in there.Should of had a vent from factory. Earlier you mentioned handling problems.Had you considered new ball joints.Looks like your project has had some major neglect .Doin a great job and nice write up and pictures. mike:)
 
Thanks. Did that tonight. 1/8 pipe thread tap and fitting. It just needs a tube and valve now. Checked the ball joints and they seem good. So much more to do on it. Every time I get under it I see something else that could be done.

Sent from my XT912 using Tapatalk
 

Jeep-CJ Donation Drive

Help support Jeep-CJ.com by making a donation.

Help support Jeep-CJ.com by making a donation.
Goal
$200.00
Earned
$0.00
This donation drive ends in
Back
Top Bottom