258 Intake Manifold Gasket

258 Intake Manifold Gasket

JeeperChris

Old Time Jeeper
Posts
1,234
Thanks
1
Location
Michigan
Vehicle(s)
'79 CJ5, 258 I6, T150 w/Dana20, Dana30 front and AMC20 rear. My first Jeep! I'm looking forward to doing some minor upgrades and restoration while enjoying the ride.
First I have two questions I need help with, then I will write up the story for those who are interested in what happened, because, well you know, it's a Jeep so there's always a story...

No1: Does the intake manifold gasket go on dry? I remember smearing a bit of blue silicon on the old Chevys back in the day.

No2: Does anyone have the Bolt size and Thread Pitch for the intake and exhaust handy?

Ok, the story. About 3 weeks ago I put the Jeep in the shop since I don't have the tools anymore to do a lot of bigger work. I will add tools later. It went in for a new master cylinder and assorted brake parts, Moser 1-piece axles, and full exhaust system. This system meant the ugly header with all the gas leaks could finally go away. Fully new system from the ex-manifold all the way to the tail including a Cat.

He was pretty booked up so he started it last Wednesday and called me today to say it was done. Great! I was getting off work early enough to catch him before he closed for his vacation weekend. Picked it up, it was great - quiet, smooth and fun like it should be. I was a happy camper.

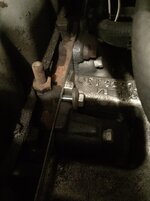
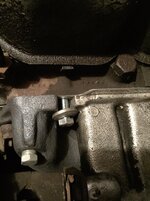
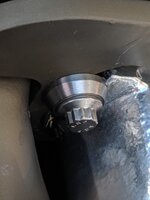
Got home (only a mile down the road) and parked it in the garage. Popped the hood. The washers that hold down the intake/exhaust in that weird sort of Jeep way were crooked. I inspected a little more. The two manifolds were not sitting flush with each other as they should. The intake manifold gasket was in the back seat, not on the engine.

So, with snow in the forecast for this Sunday/Monday I am going to do this alone. Doesn't seem like too big a deal I'm just used to V-8's. I would also like to replace the bolts with studs, that's why I wanted to know if anyone knows the size off-hand. And that's where I am now. I'll put some pics in the next block.
 
1b7a0012d0cb94797b066043c5159188.jpg

1227fedca6bbb8ef315af4eeb02983f2.jpg

c698c5942f21af33b11242921e815ef4.jpg


Sent from my iPhone using Tapatalk
 
3/8 -16 to 3/8 -24 is what I used on my 4.0 head. Pretty sure same for 4.2 head. Can get them at Ace Hardware in the specialty drawers. Or order from McMaster Carr.
 
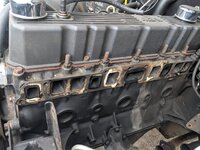
I do see a gasket in between the head and manifolds. It's not uncommon to have a height difference, usually there is small bar instead of a washer between the two manifolds. Looks like the exhaust manifold is new(er) due its color and lack of rust, so the height could be due to casting differences. Can't help on the sizes but looks to be a 3/8 bolt.
 
I do see a gasket in between the head and manifolds. It's not uncommon to have a height difference, usually there is small bar instead of a washer between the two manifolds. Looks like the exhaust manifold is new(er) due its color and lack of rust, so the height could be due to casting differences. Can't help on the sizes but looks to be a 3/8 bolt.

Thanks yellow!

RiverandSand, The gasket you are looking at is the exhaust gasket that goes across the whole side of the head. The intake gasket goes on top of this only under the intake manifold so it's a double gasket for the intake. That extra height helps the two manifolds to even out.
 
First I have two questions I need help with, then I will write up the story for those who are interested in what happened, because, well you know, it's a Jeep so there's always a story...


No1: Does the intake manifold gasket go on dry? I remember smearing a bit of blue silicon on the old Chevys back in the day.


No2: Does anyone have the Bolt size and Thread Pitch for the intake and exhaust handy?


Ok, the story. About 3 weeks ago I put the Jeep in the shop since I don't have the tools anymore to do a lot of bigger work. I will add tools later. It went in for a new master cylinder and assorted brake parts, Moser 1-piece axles, and full exhaust system. This system meant the ugly header with all the gas leaks could finally go away. Fully new system from the ex-manifold all the way to the tail including a Cat.


He was pretty booked up so he started it last Wednesday and called me today to say it was done. Great! I was getting off work early enough to catch him before he closed for his vacation weekend. Picked it up, it was great - quiet, smooth and fun like it should be. I was a happy camper.


Got home (only a mile down the road) and parked it in the garage. Popped the hood. The washers that hold down the intake/exhaust in that weird sort of Jeep way were crooked. I inspected a little more. The two manifolds were not sitting flush with each other as they should. The intake manifold gasket was in the back seat, not on the engine.


So, with snow in the forecast for this Sunday/Monday I am going to do this alone. Doesn't seem like too big a deal I'm just used to V-8's. I would also like to replace the bolts with studs, that's why I wanted to know if anyone knows the size off-hand. And that's where I am now. I'll put some pics in the next block.
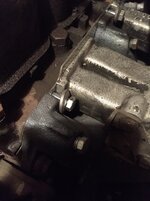
Well, did a lot of research on this before I did mine, then trial and error. Then some great advice from an old mechanic. Putting any sealant on the mating surface between your manifold and block or header and block will act more like a lubricant. Misalignment is common as a result.
I didn't listen. Should have listened.
2nd set of gaskets later I listened. Cleaned the block to a bright even surface and put the gaskets (2 in the set, one for exhaust and one for intake) on dry.
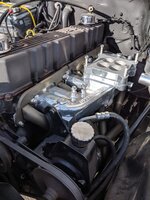
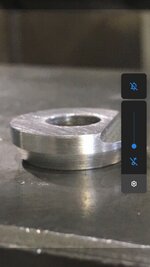
I used ARP studs and a spacer I had made specifically to bridge the thickness difference between the Hedman header and the Offy.
Solved.
No problems since.
Here are a few photos.
I'll try and find the ARP info and post it this week.
4c68d5548e68e950e82ddc6d2eb56700.jpg19f1690f02106f92ea6c5f3fe03499e2.jpg4742029ba072c2236c8c29d576a13d15.jpg434b3ce2fc558012d8d42b84c3eb4b9a.jpg7c7341d4c002e3c12a88fcd873213399.jpg

Sent from my Pixel 2 using Tapatalk
 
Oh, the spacer I had made for my application needed an undercut on the mating surface to apply EVEN pressure to both the header and manifold. To determine your specific under cut involves removing the header and manifold and placing them on a flat true surface then using a caliper to measure the difference. Suppose you could do that on the engine with them bolted the way they are but you won't be as exact. While I had them out I sent them for blast and ceramic coating to make them last longer.188e9248d598979a35a6e834869ae130.jpg

Sent from my Pixel 2 using Tapatalk
 
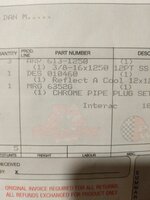
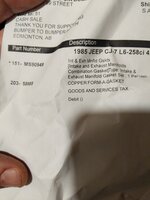
Gasket set was $40 Cdn beaver bucks and the ARP fasteners were $70.
Don't show this to my wife.
If you use them verify the length for your specific application. You may need to ask for longer (depends on what you use for a spacer.eb8fc9b43717484e91f2f17224ac3efa.jpg65874b94827a82fad3e2f24194a7608b.jpg

Sent from my Pixel 2 using Tapatalk
 
Those are the same bolts and washers, plus some thicker washers, that are on both my 4 and 6 cylinder engines, and they worked out well.
 
On a side note AMC from the factory did not use a gasket for the exhaust manifold. It mated directly to the head.
That may be the reason for the discrepancy in the thickness???
On an older engine I would be leery of not using a gasket because i'm pretty sure there would be some "warpage" going on.
 
On a side note AMC from the factory did not use a gasket for the exhaust manifold. It mated directly to the head.

That may be the reason for the discrepancy in the thickness???

On an older engine I would be leery of not using a gasket because i'm pretty sure there would be some "warpage" going on.
Agreed. You should put a true edge on the block to see what your dealing with.
Gasket would help if it's not too bad.
Factory was no gasket.
Custom headers usually call for a gasket.
The intake lobes and header lobes are often different thicknesses. That's the case on the 5 CJs I have worked on anyway.

I would stay away from sealants and gasket maker.

Dry fit. Dry fit. Dry fit.


Sent from my Pixel 2 using Tapatalk
 
I've only ever used the single one piece gasket on all the Jeep's ice worked on. I would say if everything is tight and working correctly leave it alone especially if it's calling for snow.

Sent from my E6810 using Tapatalk
 
Thank you one and all, you guys are a fantastic help!

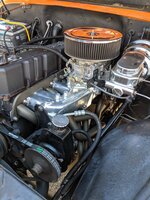
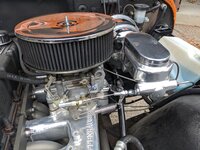
mitchelllogic, do you have a longer throttle cable on there? It looks like the ones I've seen in some Hot Rod magazines aftermarket stuff. How long is it if not stock? (and those pics are impressive)

I picked up some Dorman studs and nuts and also some simple 3/8 flat washers. I figure I will do like Manic Mechanic says and not mess with it since it is sealing well and I'll be changing to the 4bbl and Offy manifold in the Spring time. I'll put the gasket on at that time, dry. The studs I will be replacing one by one and using the washers (trimmed) to step the uneven distance on the shorter manifold so they even out for now. That will make me feel better about leaving it without the intake gasket for now.
 
Thanks for the compliment. It's been a lot of hours to get this far.
Some of my upgrades are in my build page here now.

Good eye on the throttle cable.
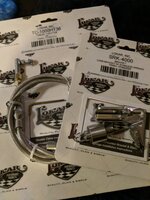
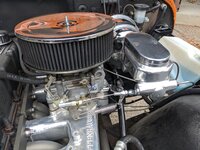
Yes the throttle cable is a universal 36" from Lokar with the Lokar mounting bracket. I've tried various others available at speed shops and find they are all lacking by comparison (plastic parts at the firewall or at the carb bracket that eventually snap). Lokar is once and done (all metal parts).
I trimmed the 36" cable down 6" so it swept around gracefully to the carb without introducing strain, bends, or kinks to avoid any friction.
24" was too tight.
Straight from the pedal to the carb without any strange brackets and pivots etc.
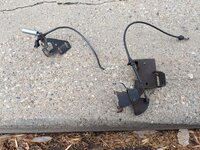
Pic of old cables included so you can see the cunfucation the P.O. worked long hours to introduce a 1" dead pedal and 1.5 second delay into the system.

Out! Out you demons! Out I say!

Throttle response is now vastly improved! Fun to drive is an understatement. Accidently burned a 360 the morning after heading to work because I wasn't used to it yet.

I think you will be thrilled with the Offy and a 4 Barrel. Do you have a sloped riser for the intake to mount the new carb on? That 1" riser makes a difference.
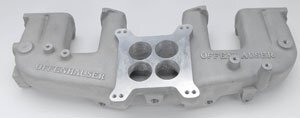
Is the Offy the dual plane fluid back version? (3rd picture).d5944c2827a29ed3c829e05283c47669.jpgaeb584d864b2e04ab37523fd765f2fa1.jpg25b84a5c0211f3e17bd52d9d0aba22b1.jpg

Sent from my Pixel 2 using Tapatalk


Question about that cable- You say you shortened it by 6". So could I remove the cable completely from the sleeve? Say from the picture here, from this end of the cable could it be pulled completely out of the sleeve before attaching the pedal end? The question is for a modification I am thinking of for the return spring.

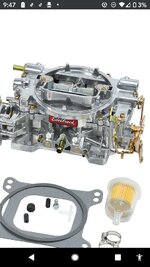
I have the carb, a Barry Grand Demon 525 vacuum secondary with annular discharge primaries and the manifold is still on my 'wish list' at Summit Racing but it is the Dual Port with the water jackets. I will put that sloped spacer on my list as well.

I can't wait for Spring!!
 
Question about that cable- You say you shortened it by 6". So could I remove the cable completely from the sleeve? Say from the picture here, from this end of the cable could it be pulled completely out of the sleeve before attaching the pedal end? The question is for a modification I am thinking of for the return spring.


I have the carb, a Barry Grand Demon 525 vacuum secondary with annular discharge primaries and the manifold is still on my 'wish list' at Summit Racing but it is the Dual Port with the water jackets. I will put that sloped spacer on my list as well.


I can't wait for Spring!!
Yes the cable slips right out of the jacket (that is a necessary part of the installation). With the tube loose there is an aluminum ferrule you position further down the tube before you cut. Then just slide it up to capture the loose end of the cut braided stainless. That then presses into the back of the fastener that rests on the carb bracket. I highly recommend you get the bracket . It aides in stiffening up the connection via a set screw that presses up against the carb body. No more wiggling around! Really simple and slick install. It took longer to get the old :dung: off.
Works for Holley and Eidelbrock.
You will have to eye it up to make sure it fits your application.
Bracket comes with the dual springs.

Sent from my Pixel 2 using Tapatalk
 
Jeeper Chris
Looking at the carb your taking about I have questions:
I'm not familiar with this one but it looks like the orientation on the dual plane Offy will put the throttle linkage and connection parallel to the firewall. Is that your understanding?
So when you pop your hood you will be looking at the electric choke?
d0a24e933b76488500ef8519b4ff67ee.jpg


Sent from my Pixel 2 using Tapatalk

So sorry,I got turned around.
Throttle linkage will face forward.

Just like the eidelbrock on mine.
370a1efc188909d1965c7d88ad6b0348.jpg

Sent from my Pixel 2 using Tapatalk
 
Actually i was thinking of turning it around so the choke faces front, this will put the primaries on the longer runners. But yes you have it right. The Demon carb is just a fine tuned Holley, the air path is smoothed out so much more, it's almost a work of art.

Thanks for the breakdown of the cable, i want to put push springs at the carb end of the cable instead of the stoc pull springs, this will reduce wear on the base plate caused by the throttle shaft. I can fab the spring holders on the lathe to keep the spring centered.
 
Actually i was thinking of turning it around so the choke faces front, this will put the primaries on the longer runners. But yes you have it right. The Demon carb is just a fine tuned Holley, the air path is smoothed out so much more, it's almost a work of art.


Thanks for the breakdown of the cable, i want to put push springs at the carb end of the cable instead of the stoc pull springs, this will reduce wear on the base plate caused by the throttle shaft. I can fab the spring holders on the lathe to keep the spring centered.
Interesting but watch the Offy. I believe the design intent is that the primaries sit inboard and give advantage to low speed. The volume of the seperate planes are different and move air differently.
If your carb doesn't need that (sounds like the carb has atomization and low throttle beat in its design) I might consider a single plane intake manifold.
The Offy is not split between cylinders like you would expect on say a V8 application.
They are split on each cylinder for low and high throttle.
Not sure there is any advantage with an Offy on that carb. Not much anyway.
Different story when dealing with an old dogleg carb. There is a marked improvement in that application.

Not sure, as I said before, I am not familiar first hand with your carb.

Sent from my Pixel 2 using Tapatalk
 

Jeep-CJ Donation Drive

Help support Jeep-CJ.com by making a donation.

Help support Jeep-CJ.com by making a donation.
Goal
$200.00
Earned
$0.00
This donation drive ends in
Back
Top Bottom
AdBlock Detected

I get it, I'm a Jeep owner and ad-block detectors kinda stink but ads are needed on this site. This is a CJ site, all the ads are set for autos (some times others get through.) I cannot make them just for Jeeps but I try.

Please allow ads as they help keep this site running by offsetting the costs of software and server fees.
Clicking on No Thanks will temporarily disable this message.
I've Disabled AdBlock    No Thanks