Build Thread The '80 FrankenJeep frame off reassembly

Build Thread The '80 FrankenJeep frame off reassembly

shum8

Voted most irritating
Gold Supporter
Posts
7,316
Thanks
156
Location
Roanoke, Va
Vehicle(s)
'80 CJ-7, AMC 304, T177, Dana 300, Widetrack axles (D30 & AMC20) w/ 3.73 gearing, MSD ignition,
Well, as the title implies, this will not be a restoration - at best a refurbishment - of a 1980 CJ7 with a variety of parts from several Jeeps. I have not the time, money, or patience for a full restoration, so refurbishing will have to do. My initial plan to re-enter the CJ world when I bought this one was to merely change all the fluids, paint it, add a stereo, and drive the snot out of it. Well, like a buddy always says - "Everybody's gotta have a plan - gives them something to abandon later", No truer words have ever been spoken. Please remember while following this build I am not restoring a Ferrari, so this will be a utilitarian build. Safety issues will be addressed properly, but I will not be spending stupid money on things that will just be banged up in the woods, crossing creeks, etc. If I were to do a full back to new restoration, it would sit in the garage covered with a blanket. Ok - here we go........ I hope I live long enough to drive it.

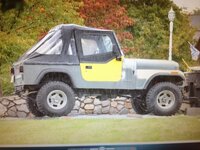
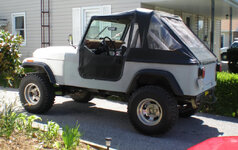
So, upon failing inspection for frame cancer I didn't notice at time of purchase (my bad), I set off in search of repair pieces for the frame. Wound up finding a really nice pre-82 frame with no cancer for 60 bucks. Not having the heart to cut up a good frame to fix a bad frame, I just finished cleaning up the "new" frame and got it painted. After asking a couple newb questions, I now realize the older frame will need the front shock mounts removed and the WT axle shock mounts added - no biggie, just time. I'll get that done this weekend, and the frame will be done and ready to accept FrankenJeep. Here's what it looked like in the PO's driveway at time of purchase:
Q7Apc6N.jpg

Here it is at it's new home:

7iQYBRb.jpg

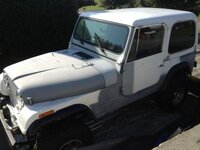
Here it is with the hard top:

LMiBiKB.jpg

When I bought it, it came with a hard top, full hard doors, soft top, full soft doors, soft half doors, bikini top, two spare hoods (one steel, one fiberglass), spare grill, transfer case, and dash. The soft top is a cool fast back top, but is a snap mount. I'm in the process of converting it to channel mount, so will be welding up the screw holes for the snaps.

The PO had already added stainless brake lines, 4" RC suspension lift (I'm assuming this based on RC shocks). He said it has a 4" lift on it, and it looks like it. It has old aluminum slots (5 of 'em), a 304 from a Wagoneer, T176, Dana 300, WT axles, and a rust free Wrangler tub.

I have been collecting stuff for it off Craigslist (I'm doing this on the cheap). I now have half doors, a VERY nice dash pad, stereo, amp, speakers, fiberglass fenders (steel ones have rust poking thru).

I'll post up a few more pics in a bit.

Robert
 
Last edited:
Ok - Got the WT shock mounts off the old frame Tues, got em sandblasted, primed and painted.

Before refinish:

b2BNY36.jpg

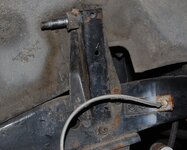
Figures after I got the new frame all cleaned up and painted I was informed I had to swap the shock mounts -

Before removal:

AXQzD19.jpg

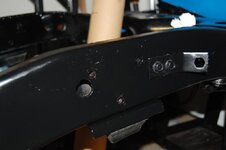
Had about an hour before the monsoon hit after work yesterday, so I cut the old mounts off and primed / painted that area. Because the orientation of the WT upper shock mount is 90 deg from the NT mount, I have to be a lot more careful where they go. Was going to just weld 'em to the frame, but have decided to drill and install cross tubes to allow both strength to the frame and a small amount of adjustability to the alignment of the mount. I've also cut plates to weld inside the mounts to keep :dung: from accumulating between it and the frame.
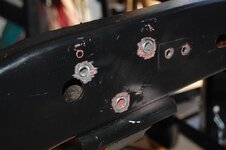
Stand by for more pics.....
 
Last edited by a moderator:
Sorry this going so slow - somehow my wife doesn't share the same sense of urgency I do. I did make a little progress yesterday - made heavy duty brackets to mount both front and rear bumpers. I made the rear brackets longer to tie into a third cross bolt on the frame, and will be using OEM style brackets on the front. Never did like two bolt heads on top of the bumper. And I know - without pics, it never happened, so I will take a few pics after mowing, etc. will also be welding in cross tubes in the frame for the front shock mounts as well.
 
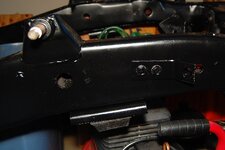
Alrighty - Got the NT shock mounts cut off, ground smooth (sorta), holes drilled for the WT shock mount bolts, and welded in the cross tubes.

LRvex0O.jpg

uhQryXV.jpg

Tues - Should be able to get the brackets sandblasted and painted. On to the proportioning valve.......
 
Last edited by a moderator:
Cool man, I've been trying to decide if I'm going to do the same as you or do a full restoration on my 80 CJ5...going to follow!
 
Sorry I haven't posted in a while - When I get a few minutes, I never wanna stop to take pics. Tomorrow, I'll take some and update the thread.

Rob
 
HAHAHA - My wife thought it would be fun to paint the downstairs this past week..... not.

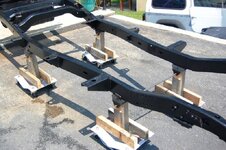
Back to the build. After getting the front shock mounts ready to go, I realized I can't put 'em on till I get the axles in place. The upper and lower shock pivots are not parallel - they're skew, so I have to have the lower mount in place to mount the upper. So on to a few more things on the frame before springs and axles.

At this point I grown tired of shifting the frame around on jack stands (my garage isn't big enough to allow elbow room on both sides of the frame.), so I rigged up the wheel dollies to work without the axles in place.

0DHfuBf.jpg

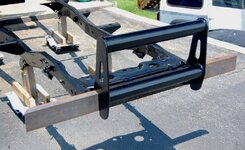
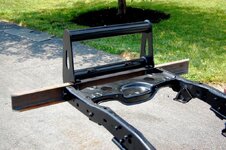
A buddy gave me a piece of 4" structural channel...... Made a nice front bumper. Since the underside of the channel flanges are angled and the top and bottom surfaces of the frame are flat, I had to reshape the front of the frame to fit the channel. Downside is it won't work with a factory front bumper any more, but the upside is it works great with the channel. Won't be an issue until the next owner wants a factory bumper. That's their problem. Oh - and the PO also threw in an old school tube brush guard. I wasn't going to use it, but after a quick coat of paint, I kinda like it. I had to move the upper mounting tabs to the inside so it would look a little cleaner with no mounting hardware showing outside the guard...... they were meant to grab the upper bumper mounting bolts which I'm not using, so it wasn't a big deal.

91MhZQj.jpg

ctZLGTL.jpg


pJpCvlL.jpg

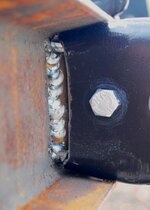
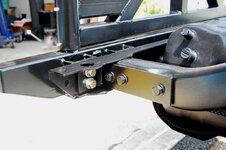
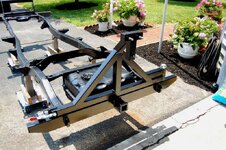
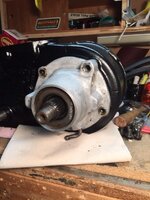
I had already finished the rear bumper / spare carrier a while back, so I made a set of fairly beefy brackets to mount the bumper assy to the frame. I utilized the existing hole locations, drilled them out a bit, welded tubing thru the frame so as to not crush the frame when tightening the bolts, and this is what I came up with.
nNP3Dv8.jpg

LsmvX3R.jpg

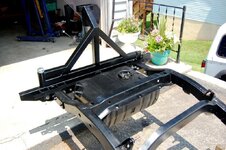
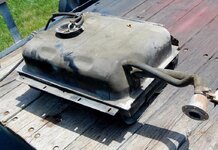
Also got the fuel tank and skid plate off the Jeep, cleaned up, painted, and on the new frame. Will be sticking a new sending unit in there before the body moves over.


rOcg4q5.jpg

Now, I am ready to pull the motor, remove the all the body parts, and start swapping the springs and axles over. I will have the house to myself for 4 days - hopefully I can make some headway.........
 
Last edited by a moderator:
I meant to show the tank before I cleaned it up..... It's in pretty good shape, just grungy.......
C5vJM0L.jpg
 
Last edited by a moderator:
Looking good :popcorn:
 
In an effort to update as I go, here's today's accomplishments. (Not much today)

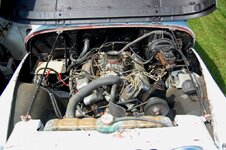
Pulled the front bumper and painted it, and began disconnecting everything in the engine compartment in preparation for pulling the engine. Not a whole lot to deal with, but labeled and photographed as I went. Here's what it looks like just beforeI started pullin' wires an stuff........ ( I did pull the air filter before I remembered I needed to take pics.)
vEGlnLw.jpg
 
Last edited by a moderator:
Love the way you rigged the frame up to roll around! Nice looking bumpers too!

Thanks - They look retarded, but they're good and solid, and I can lift either end to get them to roll over the cracks and lumps in the driveway.

As for the bumpers, I didn't have the funds for 600 bucks worth of rear bumper, so I went to a buddy's house and threw that one together. Counting the pivot kit, I think I have about 100 bucks in it, paint and all. The front bumper was a drop he had that he donated to the cause. If I hit something with that, it'll destroy the frame before it bends the front bumper :chug:
Luckily, the PO had done a bunch of the work before I got it. He had already swapped the axles, suspension lift, new clutch linkages, new brake lines (braided stainless at the wheels), rust free tub and WS frame, added the 304 - All I have to do at this point is take it apart and reassemble. (That sounds easy when you say it fast....)
 
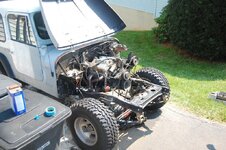
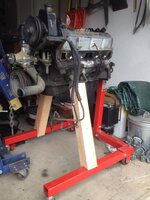
Alrighty - had the day to myself (well, until 4:30 or so) and decided today was open heart surgery day. Finally pulled the motor from FrankenJeep. I haven't gotten into takin' brackets and whatnot off the block yet, but up to this point, I have thanked the PO several times to myself - anti-seize everywhere. Even the header bolts both at the block and first connection came right apart.

Started out removing the fenders and grill to make engine removal a little easier.

RA9agRR.jpg

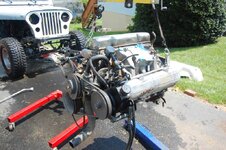
After wrestling with a motor that didn't want to leave it's home, I realized I had not disconnected the power steering lines. Once that was done, she popped right out.

bXiaino.jpg

Took lots of photos so I will be able to reassemble with everything in its proper place. Clutch appears to be near new, starter also looks very "unused", and my headlight upgrade came in the mail yesterday...... Wish I could go ahead and use it..... I figure with the motor out, it's time for a slew of new gaskets. Can't afford to rebuild, but I at least need to do the gaskets. and a water pump.

Since it was time to go teach class, and a nice thunderstorm was inbound, I parked the motor in the garage ready to be degreased and painted.

yLcWiwM.jpg

And I didn't totally trust the stand, so I added a couple extra braces........

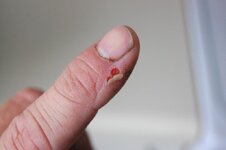
And uncharacteristic of me, I only boogered up one finger this time......

mRnQEni.jpg
 
Last edited by a moderator:
Well, nothing exciting to report - spent most of the day yesterday getting the stupid pressure washer to run.... It won yesterday, but this morning it gave up and ran like it was supposed to. First round of degreasing and pressure washing in the books. I'd post pics, but right now it looks just like the other pics..... Ordering paint and new dip stick and holder today.
 
I bet you guys thought I was abducted..... Nah - life just got in the way. Anyway - I'm getting back on this.....I'm determined to drive it before I assume room temperature.

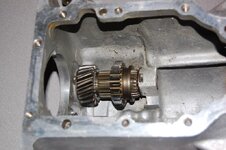
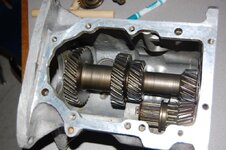
Just opened up the tranny, cleaned it out, and ordered a rebuild kit for it. I figure while I have it out new seals, bearings, and syncros wouldn't be a bad idea.

Sorry for the huge delay, but I'm back on this.........

R
 
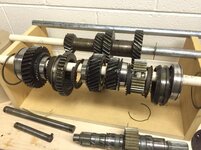
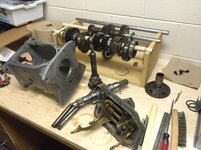
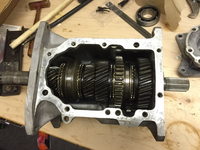
Alrighty - I opened up the T176 to see what it looked like, and everything looks good. I had a little noise in 1st thru 3rd, but 4th was quiet, so I figured new bearings, synchros, seals, and thrust washers wouldn't hurt. Even the synchros looked good, and I don't know how long it's been since the transmission's been gone thru, so this is more preventive maintenance. Besides, I've never gone thru one, and I'd rather do it now than when I need it to go to work.......

Rebuild kit from Novak came in yesterday, and heres what I got done yesterday after work

k44BgWc.jpg

JzC2ZpF.jpg
 
Last edited by a moderator:
Alrighty - Got the reassembly started on the tranny..... Reverse idler cluster in place...

kFyoRK8.jpg

Countershaft assembly back home.

mAXTMnn.jpg

Just realized the instructions say to leave this cluster in the bottom of the case until main shaft is in place for clearance..... But it was in place when the main shaft came out. Ya know I'm gonna have to try to not remove the countershaft again....

This is why I haven't finished this stupid thing yet - I keep getting lost in the details..... Even cleaned the magnet up...

jWYxOTL.jpg

Hopefully will get the rest of the tranny buttoned up tomorrow afternoon. Then I have to tear down the transfer case a bit - noticed somewhere in it's history someone went thru it and left the shifter fork pads off of one of the forks....... Sooooo, I get to put a set in.

What it should look like:

UMriDh1.png

The troublesome side...

CRlWA2v.png
 
Last edited by a moderator:
Transmission is ready to be buttoned up.

MOVUd0K.png

Now on to the missing pads in the transfer case......
 
Last edited by a moderator:
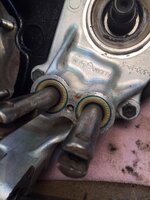
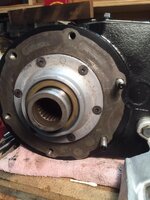
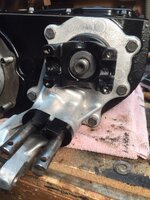
Well, after pulling the input bearing retainer, the lower fork pad that was supposedly missing was in place - it was only missing the upper pad.

t9rzK6e.jpg

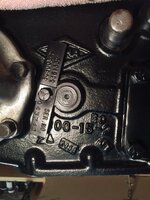
Got all the gaskets and seals replaced on both the transmission and the transfer case. Transfer case is ready to go, and need to seal up the top cover on the transmission - that'll give me something to do tomorrow...

9Q7F84q.jpg

GzOkCNa.jpg

Anr00VW.jpg

sF9NSVu.jpg

fcnz9mU.jpg

c46bmPd.jpg
 
Last edited by a moderator:

Jeep-CJ Donation Drive

Help support Jeep-CJ.com by making a donation.

Help support Jeep-CJ.com by making a donation.
Goal
$200.00
Earned
$0.00
This donation drive ends in
Back
Top Bottom
AdBlock Detected

I get it, I'm a Jeep owner and ad-block detectors kinda stink but ads are needed on this site. This is a CJ site, all the ads are set for autos (some times others get through.) I cannot make them just for Jeeps but I try.

Please allow ads as they help keep this site running by offsetting the costs of software and server fees.
Clicking on No Thanks will temporarily disable this message.
I've Disabled AdBlock    No Thanks