Build Thread Project Ruby 1978 Ground Up

Build Thread Project Ruby 1978 Ground Up

Ruby

Jeeper
Posts
43
Thanks
0
Location
Upstate NY
Vehicle(s)
‘78 CJ5, 360, T150, D30,D20
Started my build about two years ago with my 1978 CJ5, will post the journey of my tear down and reassembly along my journey
Posted via a mobile device.
 
Can't wait! And welcome!

At least show us a teaser pic!!!

PICTURES!!!!!
 
Here are a few from when I got it and began the tear down, A few are credited to the previous owner
 

Attachments

  • IMG_1539.jpg
    IMG_1539.jpg
    97.4 KB · Views: 83
  • IMG_1527 (2).jpg
    IMG_1527 (2).jpg
    96.5 KB · Views: 63
  • IMG_1541.jpg
    IMG_1541.jpg
    93.7 KB · Views: 75
Welcome. Looks like you have a nice winter project to work on.
 
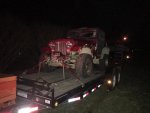
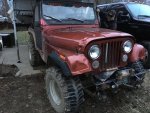
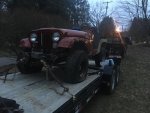
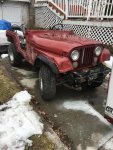
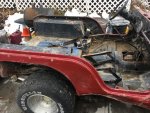
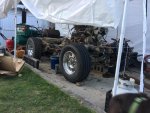
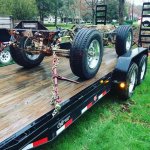
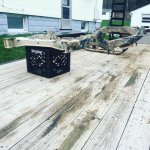
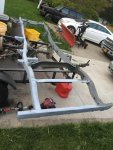
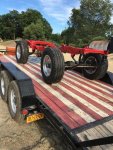
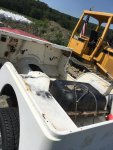
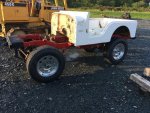
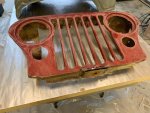
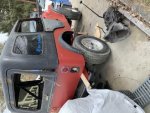
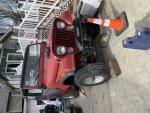
A couple more from the teardown, the tub was in rough shape and the jeep came with a fiberglass replacement so thats what I ended up replacing it with, also have new wheels and tires that are on it for now
 

Attachments

  • IMG_1664.jpg
    IMG_1664.jpg
    97.5 KB · Views: 46
  • IMG_1666.jpg
    IMG_1666.jpg
    99.1 KB · Views: 64
  • IMG_1668.jpg
    IMG_1668.jpg
    98.4 KB · Views: 34
  • IMG_1740.jpg
    IMG_1740.jpg
    97.7 KB · Views: 45
  • IMG_1826.jpg
    IMG_1826.jpg
    97 KB · Views: 69
Getting the t18 and 360 cleaned up and stripping the frame
 

Attachments

  • IMG_1829.jpg
    IMG_1829.jpg
    96.8 KB · Views: 60
  • IMG_1858.jpg
    IMG_1858.jpg
    97 KB · Views: 59
  • IMG_1888.jpg
    IMG_1888.jpg
    99.6 KB · Views: 32
  • IMG_1893.jpg
    IMG_1893.jpg
    98.7 KB · Views: 29
  • IMG_1915.jpg
    IMG_1915.jpg
    97.1 KB · Views: 22
Tore the springs down too, What was left of the front pinion, and the frame when it came out of sandblasting
 

Attachments

  • IMG_2094.jpg
    IMG_2094.jpg
    98.3 KB · Views: 27
  • IMG_2095.jpg
    IMG_2095.jpg
    98.7 KB · Views: 44
  • IMG_2025.jpg
    IMG_2025.jpg
    94.5 KB · Views: 34
  • IMG_4121.jpg
    IMG_4121.jpg
    98.2 KB · Views: 49
  • IMG_2093.jpg
    IMG_2093.jpg
    97.6 KB · Views: 50
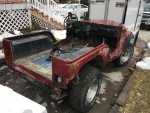
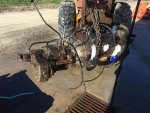
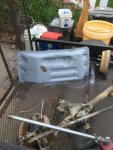
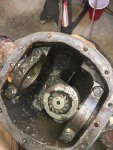
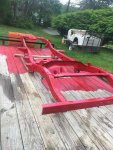
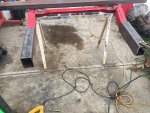
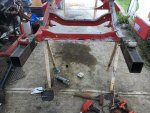
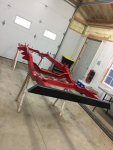
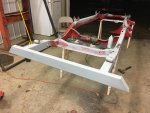
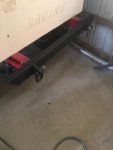
Coated and Repaired the rotten rear frame, rewelded the seams all the way down the box from cracks, Replaced the rear with 2x4x3/16'' steel box
 

Attachments

  • IMG_2173.jpg
    IMG_2173.jpg
    97.7 KB · Views: 41
  • IMG_2481.jpg
    IMG_2481.jpg
    97.5 KB · Views: 66
  • IMG_2482.jpg
    IMG_2482.jpg
    95.5 KB · Views: 61
  • IMG_2483.jpg
    IMG_2483.jpg
    98.3 KB · Views: 29
  • IMG_3298.jpg
    IMG_3298.jpg
    92.7 KB · Views: 30
A second coat on the frame and the final after the rear was done and what it looks like with the tub on
 

Attachments

  • IMG_3306.jpg
    IMG_3306.jpg
    94.5 KB · Views: 29
  • IMG_4626.jpg
    IMG_4626.jpg
    96.9 KB · Views: 43
  • IMG_3317.jpg
    IMG_3317.jpg
    91.3 KB · Views: 30
  • IMG_3307.jpg
    IMG_3307.jpg
    97.4 KB · Views: 36
  • IMG_20251.jpg
    IMG_20251.jpg
    91.8 KB · Views: 36
completely rebuilt the front axle and changed both axle oils, the Trailer got a 20' american flag also after painting the frame on it
 

Attachments

  • IMG_4507.jpg
    IMG_4507.jpg
    99.3 KB · Views: 56
  • IMG_4516.jpg
    IMG_4516.jpg
    97 KB · Views: 35
  • IMG_4519.jpg
    IMG_4519.jpg
    97.5 KB · Views: 32
Dry fitting the tub and panels before body prep, the grille was the only salvagable part of the front so I was able to find fenders and a good hood from a CJ7 that was being parted, she sits about 4'' taller than when I took her apart
 

Attachments

  • IMG_4780.jpg
    IMG_4780.jpg
    96.6 KB · Views: 53
  • IMG_4682.jpg
    IMG_4682.jpg
    96.8 KB · Views: 43
  • IMG_4627.jpg
    IMG_4627.jpg
    96.9 KB · Views: 66
  • IMG_00101.jpg
    IMG_00101.jpg
    97.5 KB · Views: 59
  • IMG_4681.jpg
    IMG_4681.jpg
    97.7 KB · Views: 55
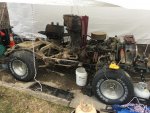
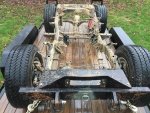
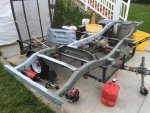
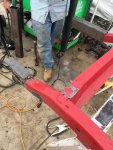
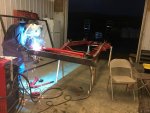
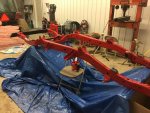
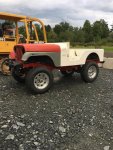
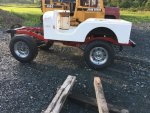
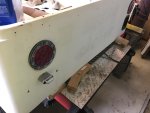
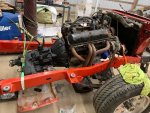
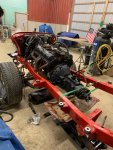
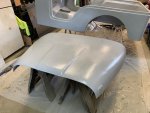
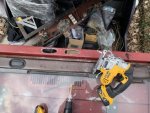
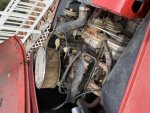
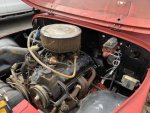
Had 1'' Plate shackle mounts made locally and welded them on the rear so it will match the front, Also installed maxxima LED's on the rear tub, Got the engine and transmission in, and Prepped the body for Monstaliner
 

Attachments

  • IMG_4865.jpg
    IMG_4865.jpg
    65.4 KB · Views: 53
  • IMG_5033.jpg
    IMG_5033.jpg
    83.6 KB · Views: 63
  • IMG_0010.jpg
    IMG_0010.jpg
    93 KB · Views: 48
  • IMG_0116.jpg
    IMG_0116.jpg
    96.2 KB · Views: 39
  • IMG_0124.jpg
    IMG_0124.jpg
    92.6 KB · Views: 54
The 300 T-case ended up being no bueno so I mated the factory 3 speed back up, More of the Monstaliner prep
 

Attachments

  • IMG_0223.jpg
    IMG_0223.jpg
    98.7 KB · Views: 57
  • IMG_0224.jpg
    IMG_0224.jpg
    99.1 KB · Views: 56
  • IMG_0118.jpg
    IMG_0118.jpg
    96.5 KB · Views: 44
  • IMG_0120.jpg
    IMG_0120.jpg
    97.8 KB · Views: 68
  • IMG_0121.jpg
    IMG_0121.jpg
    94.9 KB · Views: 50
Epoxy 2k Primer and 1st coat of Black Monstaliner
 

Attachments

  • IMG_0164.jpg
    IMG_0164.jpg
    92.5 KB · Views: 46
  • IMG_0163.jpg
    IMG_0163.jpg
    97.1 KB · Views: 49
  • IMG_0153.jpg
    IMG_0153.jpg
    95.5 KB · Views: 50
  • IMG_0151.jpg
    IMG_0151.jpg
    90.4 KB · Views: 59
  • IMG_0161.jpg
    IMG_0161.jpg
    93.8 KB · Views: 55
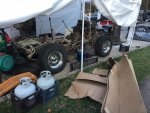
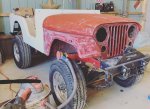
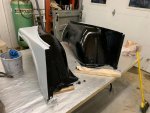
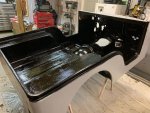
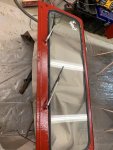
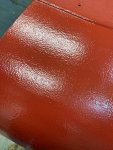
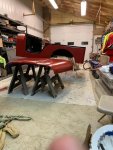
Wanted to stay as close to the factory "Ruby" but with my own twist so I decided to use the Bloodbath color of Monstaliner. Was going to spray but decided to roll on instead and am glad I did. spent about 12 hours total between the priming and final coat of bloodbath
 

Attachments

  • IMG_0173.jpg
    IMG_0173.jpg
    95.1 KB · Views: 57
  • IMG_0172.jpg
    IMG_0172.jpg
    98.4 KB · Views: 52
  • IMG_0168.jpg
    IMG_0168.jpg
    95.9 KB · Views: 49
  • IMG_0167.jpg
    IMG_0167.jpg
    96.9 KB · Views: 55
  • IMG_0174.jpg
    IMG_0174.jpg
    96.4 KB · Views: 57
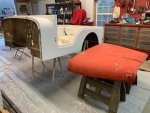
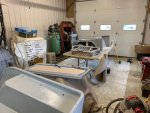
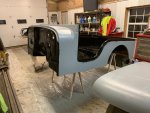
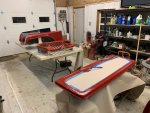
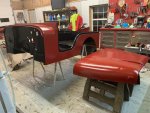
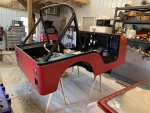
The reassembly of the tub and every panel back on the chassis, This batch is the past month and am where I am up to currently, was torn between all chrome trim and black so I went mostly black but used the Totally stainless hardware kit and highly recommend it to anyone considering using it
 

Attachments

  • IMG_0238.jpg
    IMG_0238.jpg
    96.2 KB · Views: 67
  • IMG_0237.jpg
    IMG_0237.jpg
    96.5 KB · Views: 62
  • IMG_0177.jpg
    IMG_0177.jpg
    97.6 KB · Views: 60
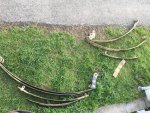
Getting back into the swing of things, installing my stainless fuel and brake lines, been about a year since I tore it all down👍🏻
 
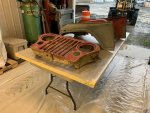
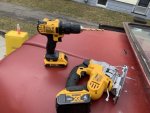
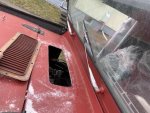
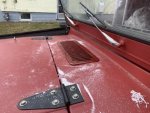
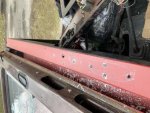
Got around to installing the vents and blower box today with help of some new tools and nice weather
 

Attachments

  • 83547E2A-0F27-40F9-B5B1-733C41F11DEF.jpg
    83547E2A-0F27-40F9-B5B1-733C41F11DEF.jpg
    20.1 KB · Views: 58
  • 3F7A96D3-CF93-47C8-AC8E-00CC6257DEE6.jpg
    3F7A96D3-CF93-47C8-AC8E-00CC6257DEE6.jpg
    20.3 KB · Views: 58
  • 28E0690D-810E-408C-A4F5-BDCFC3CCFA13.jpg
    28E0690D-810E-408C-A4F5-BDCFC3CCFA13.jpg
    20.1 KB · Views: 36
  • FED636AF-6A10-441A-886D-5390BEC3BA71.jpg
    FED636AF-6A10-441A-886D-5390BEC3BA71.jpg
    20.2 KB · Views: 50
Def vent
 

Attachments

  • CFC262B2-ECCB-4021-922A-7390754E994E.jpg
    CFC262B2-ECCB-4021-922A-7390754E994E.jpg
    20.6 KB · Views: 45
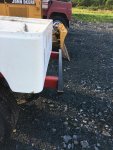
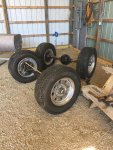
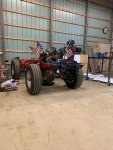
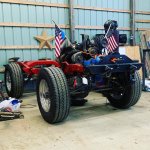
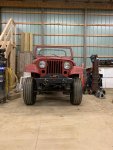
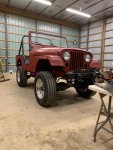
A couple more since the brake and fuel lines, fender flares and buttoning up other loose ends, torn on wheels and tires since getting it back together, it has narrow tracks under it
 

Attachments

  • 73528993-CDF0-47E2-AFA6-0CD679D31FDA.jpg
    73528993-CDF0-47E2-AFA6-0CD679D31FDA.jpg
    20.8 KB · Views: 42
  • D773CA50-CBE6-450F-B07F-A812C7C540DD.jpg
    D773CA50-CBE6-450F-B07F-A812C7C540DD.jpg
    21.2 KB · Views: 54
  • ABF04A87-F95B-493A-94B1-5AF6B08F0C54.jpg
    ABF04A87-F95B-493A-94B1-5AF6B08F0C54.jpg
    20.4 KB · Views: 50
  • 6266B226-A444-49FD-8893-D9A77BA8F954.jpg
    6266B226-A444-49FD-8893-D9A77BA8F954.jpg
    20.4 KB · Views: 66

Jeep-CJ Donation Drive

Help support Jeep-CJ.com by making a donation.

Help support Jeep-CJ.com by making a donation.
Goal
$200.00
Earned
$10.00
This donation drive ends in
Back
Top Bottom