I Built a New Defroster Duct
Rick1956
Jeeper
- Posts
- 12
- Thanks
- 6
- Location
- Edgewood, Washington
- Vehicle(s)
- 81 CJ7, 258, SR-4, Dana 300, Dana 30, AMC 20
My 81 had a dash panel in it that was totally garfed up by one of the previous owners. For whatever reason, someone chose to cut part of the speakers out instead of removing them. Then, if that wasn't enough, they decided all those protective slots cut into the dash were really cutting down on their music volume or something, so they grabbed their snips, chisel, or chainsaw and deftly removed them as well. 
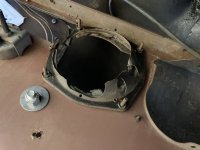
When I decided to replace the dash, I chose a stainless version (even though I was planning on painting it) with all the cutouts and holes included.
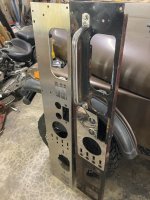
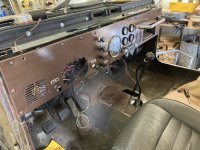
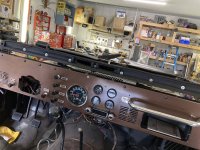
When it arrived, I carefully plotted (or so I thought) a couple of locations for new mechanical oil pressure and temp gauges I already had on hand. Going though all the rights steps to make sure I didn't smoke my hole saw, I carved two new holes. I was happy with the result! I was so smug about it that I went ahead and painted it all up and assembled it.
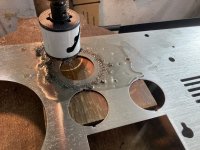
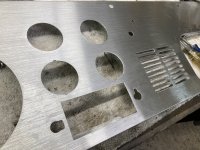
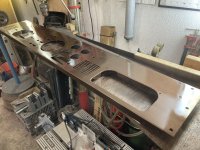
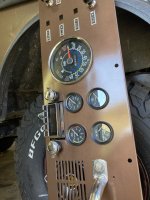
It was at this time I realized my mistake.
Because I had my whole heater box out while I was going through its rebuild process, the whole dash/firewall area was wide open, and the dash fit there easily with no obstruction. I was working on them both at the same time, and when the heater box was finished I installed it, along with the previously not-yet-installed plastic defroster duct. When I casually grabbed the completely-assembled dash to install it, imagine my surprise when it came nowhere close to fitting. I'm talking a couple inches short. Hah! Serves me right--cocky bastid. I was about to concede and build some nice block-off plates for my 2 new 2-1/16" "ventilation" holes when it occurred to me there may be another way out of this.
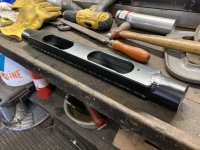
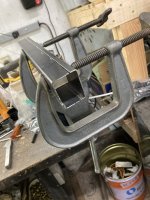
I started with a piece of thin wall, 2-inch square tubing. The perfect size, it nestles right up in that channel nicely with wiggle room to spare. After I determined the length of my new defroster plenum (based on the existing mounting screws) and cut it, then I chucked up my 1 3/4" hole saw and grabbed the cutting juice.
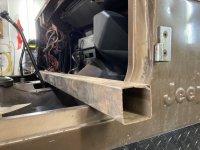
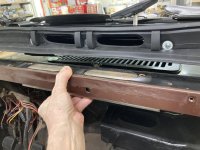
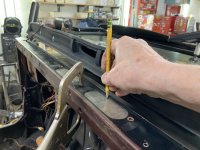
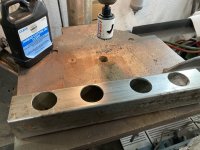
I used my cutoff saw to connect the dots.
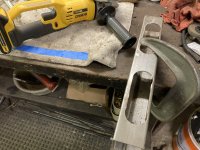
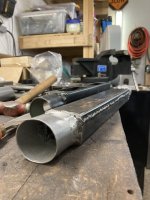
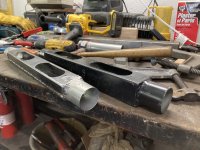
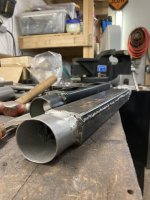
I had bought a length of 2" exhaust pipe at my local O'Reilly's, and at the same time ordered a length of 2" Dorman defroster hose. I went back home and commenced cutting up the exhaust tubing to weld onto the ends of the new plenum. I was able to employ one of my most seldom-used-but-always-appreciated tools: my exhaust shaper. It made nice, rounded ends for the hose to slide over, as well as fluting outward to help with the weld sizing.
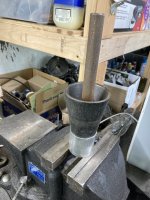
About this time they called and said my defroster hose was in, so I jetted down and grabbed that. When I got home and checked it out, I was really happy with the build quality of the hose. Good strong material with strong metal spring backbone. Feeling good!
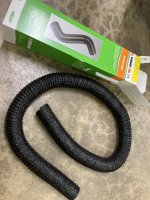
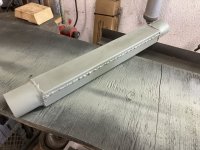
It was about this time I noticed that those 2" ends I lovingly crafted would not fit into the 2" hose. The hose is very flexible, but not diameter-wise! Back to the store--this time for a length of 1 7/8" exhaust pipe. Perfect fit! So, after lovingly rebuilding my plenum ends, I welded them all together. This time I opted not to use the exhaust shaper, figuring it would just make the hose have less to "bite" on, so I just deburred real well.
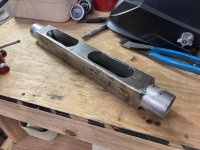
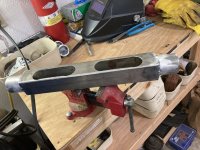
A little primer and corrosion control via good ol' bomb can, and we're in business!
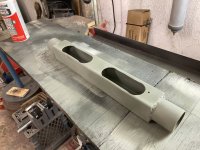
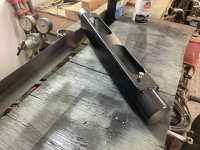
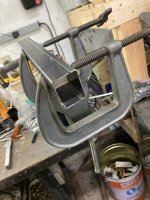
Now that the plenum is build and fits into place perfectly, it was time to concentrate on the heater box adapter. I didn't have a lot to work with as far as sheet metal goes, so I was dealing with welding 22-gauge to 16-gauge, which is no fun for a half-assed welder like myself, but I got it done. I started with cutting out some shapes. The 22-gauge strip to mimic the duct shape was easy to cut, so I started there.
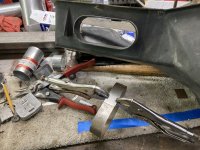
The flat section was cut from 16-gauge, using snips. I went down to the store yet again for yet another hole saw--this time 1 7/8". I'm wondering why I didn't buy the complete set to start with... After cutting the parts and test fitting, I tacked them all in place. I decided to leave a little lip that extended upward, allowing me a small "dam" to use to contain my seam sealer.
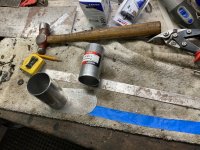
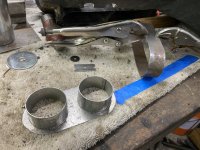
How's this for ugly? The whole reasoning here was, the metal thicknesses were a pain I didn't need, and because there is no stress on this part, there's no need for full weld all the way around. Glob welds are great and worked out nicely.
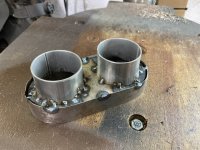
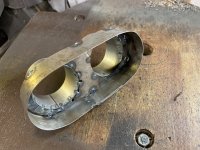
It's super-sturdy, and slides over the heater duct so nicely it doesn't even need a screw to hold it on! Time to fill up the pot with some of my leftover Dynatron seam sealer.
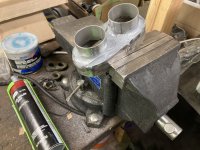
A little bomb-can corrosion control on this guy and it matches the other end.
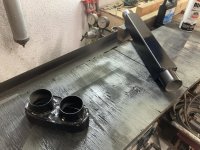
Here is the whole thing installed before I cut the hoses. I was too chicken without test-fitting how it all draped and where.
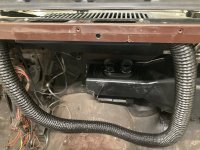
After making the cuts and hooking it all up, here's the result. I used stout zip ties and my zip tie tool for a nice, tight hose install. Look at all that space!
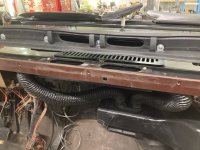
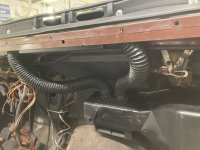
I was feeling good at this point. I installed the dash and it fit, but not like I hoped it would fit. Things were still too tight for my liking at the very top. Note to self (and others who use this idea for their own mod): Place your two new gauges as close to the lower originals as you can safely. In my case another 1/4" would have worked wonders. Instead, I decided to rebuild the plenum. (I'm not afraid to show my booboos!) Because of posting limitations, I'll add that below as a reply to this post.
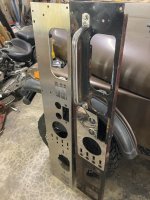

When I decided to replace the dash, I chose a stainless version (even though I was planning on painting it) with all the cutouts and holes included.

When it arrived, I carefully plotted (or so I thought) a couple of locations for new mechanical oil pressure and temp gauges I already had on hand. Going though all the rights steps to make sure I didn't smoke my hole saw, I carved two new holes. I was happy with the result! I was so smug about it that I went ahead and painted it all up and assembled it.


It was at this time I realized my mistake.
Because I had my whole heater box out while I was going through its rebuild process, the whole dash/firewall area was wide open, and the dash fit there easily with no obstruction. I was working on them both at the same time, and when the heater box was finished I installed it, along with the previously not-yet-installed plastic defroster duct. When I casually grabbed the completely-assembled dash to install it, imagine my surprise when it came nowhere close to fitting. I'm talking a couple inches short. Hah! Serves me right--cocky bastid. I was about to concede and build some nice block-off plates for my 2 new 2-1/16" "ventilation" holes when it occurred to me there may be another way out of this.
I started with a piece of thin wall, 2-inch square tubing. The perfect size, it nestles right up in that channel nicely with wiggle room to spare. After I determined the length of my new defroster plenum (based on the existing mounting screws) and cut it, then I chucked up my 1 3/4" hole saw and grabbed the cutting juice.


I used my cutoff saw to connect the dots.

I had bought a length of 2" exhaust pipe at my local O'Reilly's, and at the same time ordered a length of 2" Dorman defroster hose. I went back home and commenced cutting up the exhaust tubing to weld onto the ends of the new plenum. I was able to employ one of my most seldom-used-but-always-appreciated tools: my exhaust shaper. It made nice, rounded ends for the hose to slide over, as well as fluting outward to help with the weld sizing.

About this time they called and said my defroster hose was in, so I jetted down and grabbed that. When I got home and checked it out, I was really happy with the build quality of the hose. Good strong material with strong metal spring backbone. Feeling good!

It was about this time I noticed that those 2" ends I lovingly crafted would not fit into the 2" hose. The hose is very flexible, but not diameter-wise! Back to the store--this time for a length of 1 7/8" exhaust pipe. Perfect fit! So, after lovingly rebuilding my plenum ends, I welded them all together. This time I opted not to use the exhaust shaper, figuring it would just make the hose have less to "bite" on, so I just deburred real well.


A little primer and corrosion control via good ol' bomb can, and we're in business!


Now that the plenum is build and fits into place perfectly, it was time to concentrate on the heater box adapter. I didn't have a lot to work with as far as sheet metal goes, so I was dealing with welding 22-gauge to 16-gauge, which is no fun for a half-assed welder like myself, but I got it done. I started with cutting out some shapes. The 22-gauge strip to mimic the duct shape was easy to cut, so I started there.

The flat section was cut from 16-gauge, using snips. I went down to the store yet again for yet another hole saw--this time 1 7/8". I'm wondering why I didn't buy the complete set to start with... After cutting the parts and test fitting, I tacked them all in place. I decided to leave a little lip that extended upward, allowing me a small "dam" to use to contain my seam sealer.


How's this for ugly? The whole reasoning here was, the metal thicknesses were a pain I didn't need, and because there is no stress on this part, there's no need for full weld all the way around. Glob welds are great and worked out nicely.


It's super-sturdy, and slides over the heater duct so nicely it doesn't even need a screw to hold it on! Time to fill up the pot with some of my leftover Dynatron seam sealer.

A little bomb-can corrosion control on this guy and it matches the other end.

Here is the whole thing installed before I cut the hoses. I was too chicken without test-fitting how it all draped and where.

After making the cuts and hooking it all up, here's the result. I used stout zip ties and my zip tie tool for a nice, tight hose install. Look at all that space!


I was feeling good at this point. I installed the dash and it fit, but not like I hoped it would fit. Things were still too tight for my liking at the very top. Note to self (and others who use this idea for their own mod): Place your two new gauges as close to the lower originals as you can safely. In my case another 1/4" would have worked wonders. Instead, I decided to rebuild the plenum. (I'm not afraid to show my booboos!) Because of posting limitations, I'll add that below as a reply to this post.


